Three Ways to Provide Shipping Notices
As a supplier, you have three options for providing Shipping Notices via in ProcurosCreate Manually
Create Manually
Create Shipping Notices directly in the Procuros portal using the built-in form interface.Steps to follow
- Open the corresponding order
- Click on “Create Shipping Notices” in the top right corner
- Select “Create Manually”
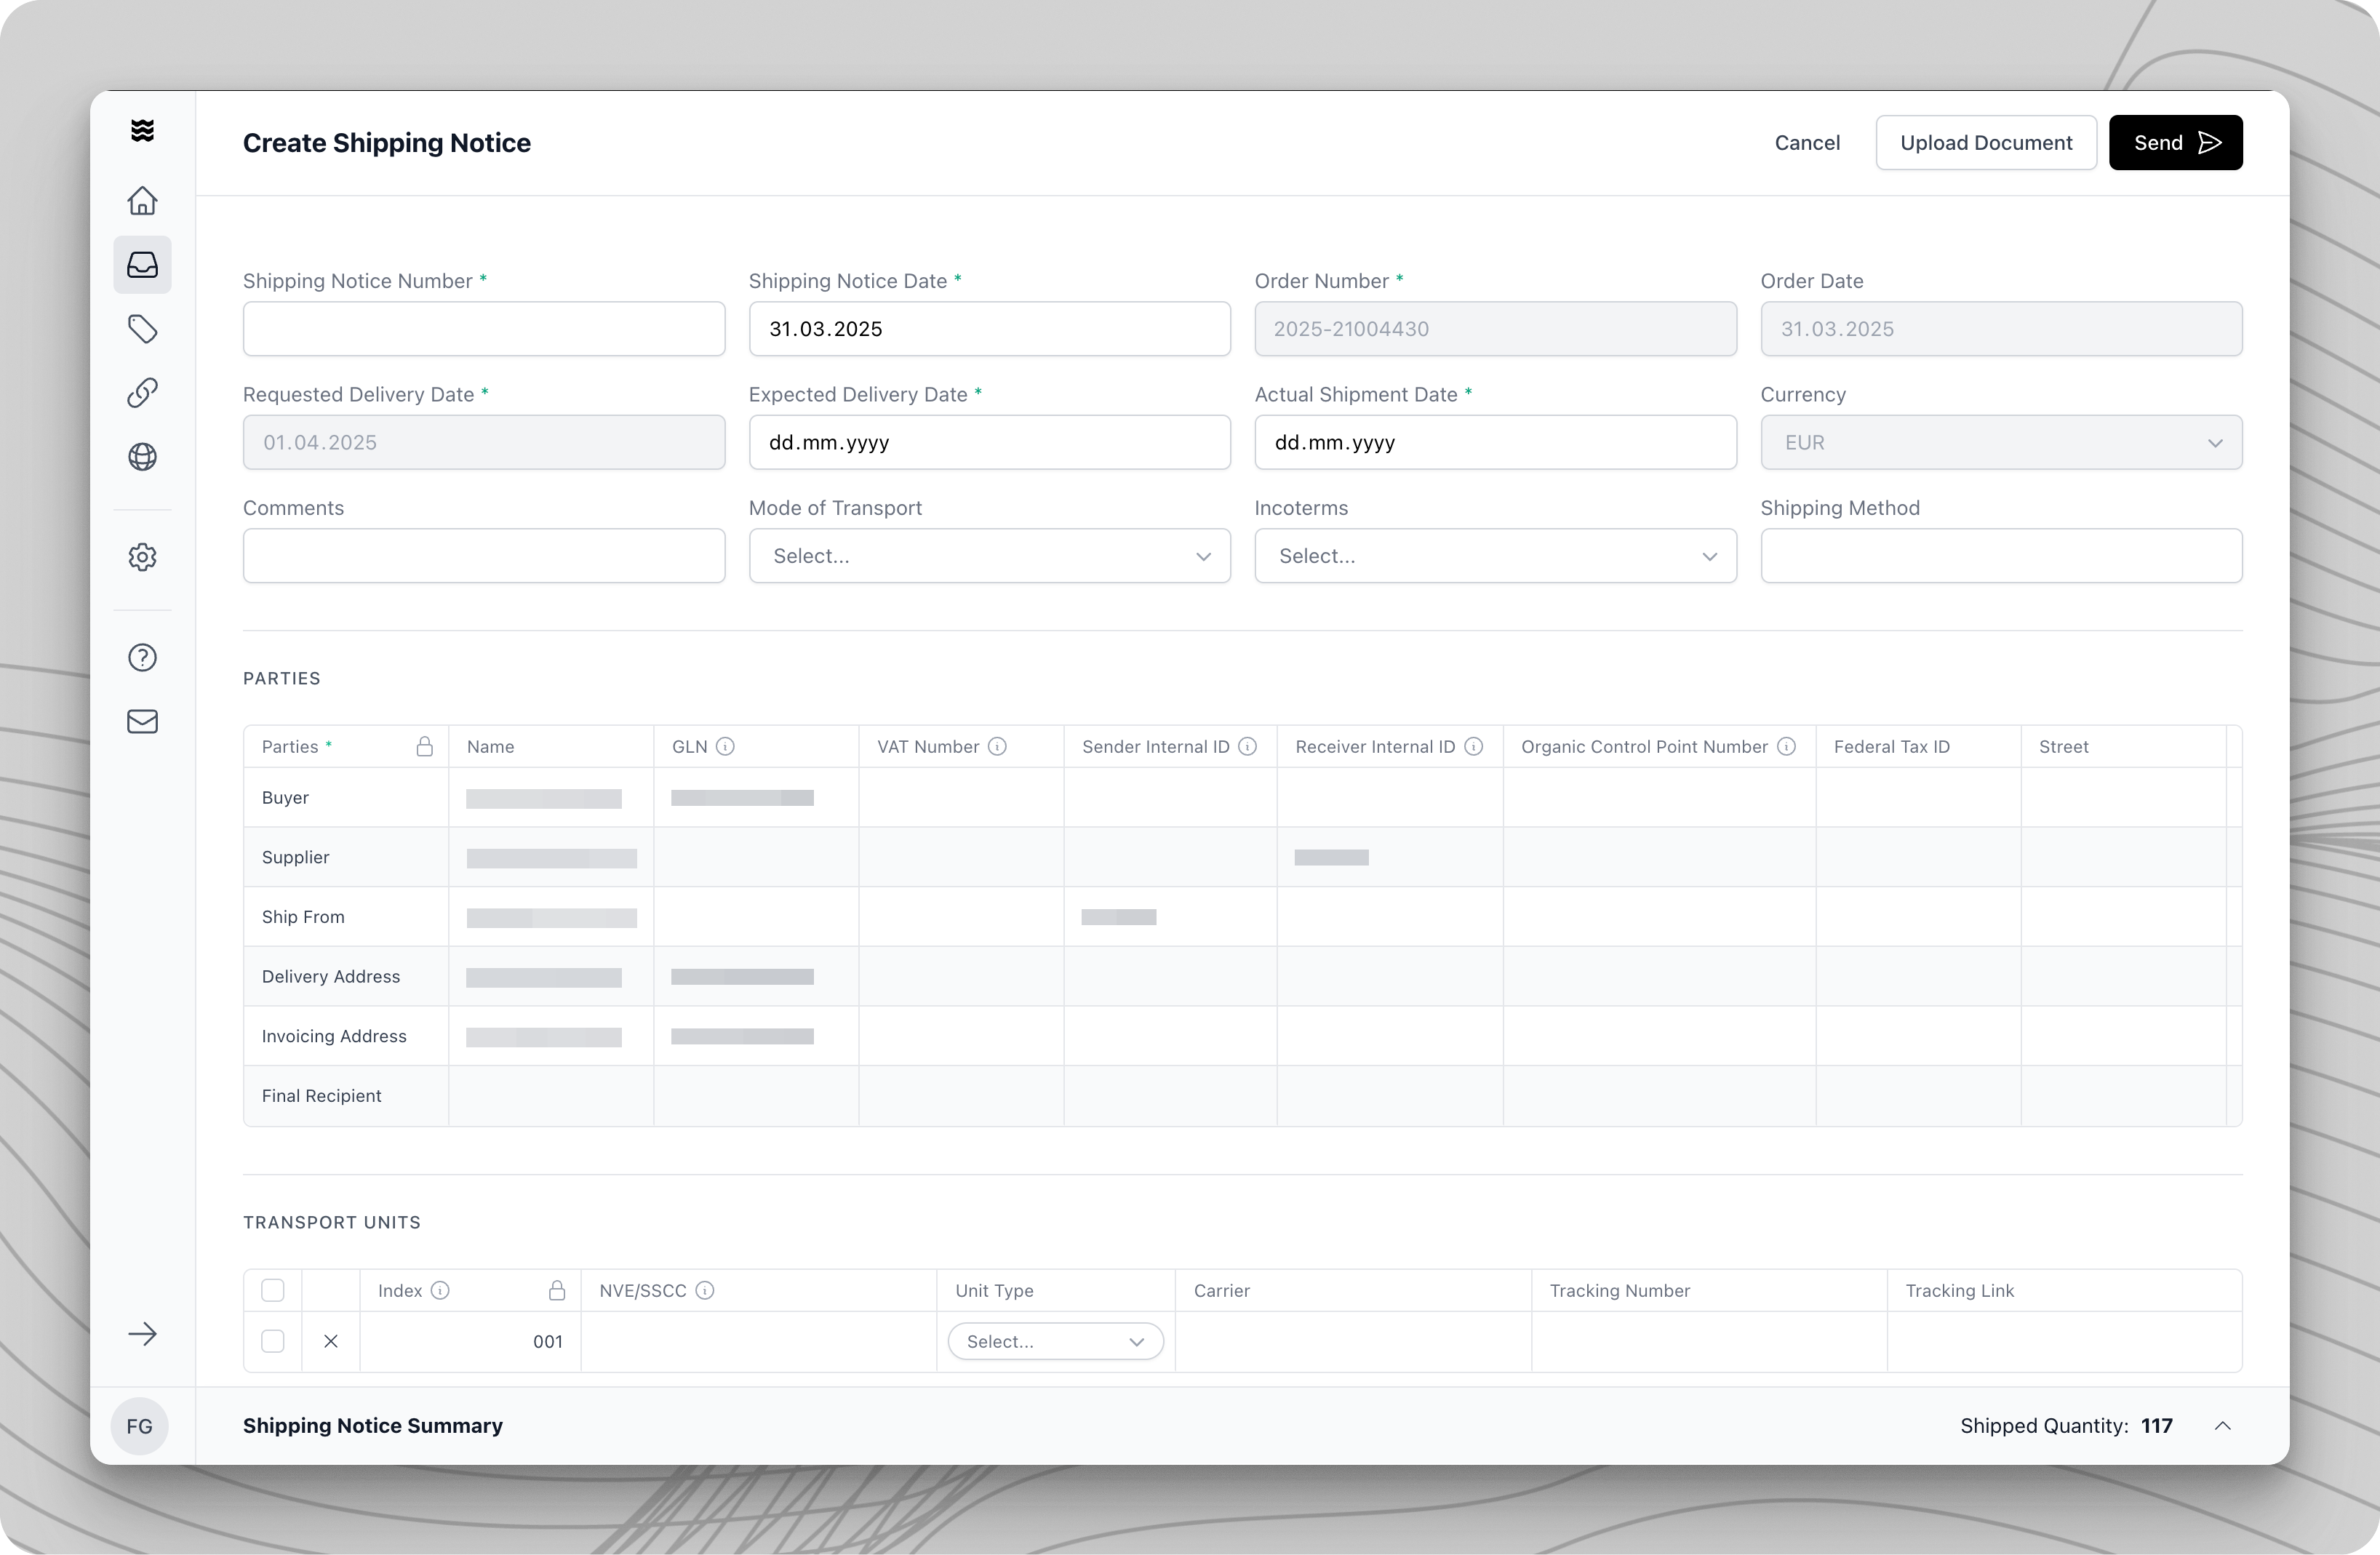
- The input form opens for manual editing with the transferred data from the order
Editing the Item Table
Editing the Item Table
- Change values: Click on a cell and enter the new value.
- Remove items: Click “X” next to the row (quantity will be set to 0).
- Add new items: Use “Add” and “New Item.”
- Search: Use the search bar for name, GTIN, quantity, etc.
Locked fields (indicated by a lock symbol) cannot be edited as they are automatically calculated or taken from previous documents.
Sending the Document
Sending the Document
Before sending, the system automatically checks the document.Identify Issues
- Problematic fields are highlighted in red.
- An exclamation mark indicates errors.
- Click on the marked field.
- Read the error message.
- Make the necessary corrections.
- Ensure all issues are resolved.
- Click “Send.”
After successful transmission, you can create follow-up documents such as invoices if needed.
Upload PDF Document in the Portal
Upload PDF Document in the Portal
Upload an existing Shipping Notice as a PDF file.Steps to follow
- Open the corresponding order.
- Click on “Create Shipping Notices” in the top right corner.
- Select “Upload Document.”
- Upload an existing shipping notices.
Forward PDF Document via Email
Forward PDF Document via Email
Steps to follow
- Get your personalized “Procuros inbound” email after your first order. Contact [email protected] in case you did not receive it.
- Send PDF of your shipping notice to your personalized “Procuros inbound” email (no subject or text needed). We recommend saving this email in your system for automatic sending or setup automatic forwarding within your ERP or email client. Learn more about it here.
- Verify delivery status by checking the portal, where all transaction records are visible (if needed).
- Only send one shipping notice per PDF file. Do not send multiple shipping notices within one PDF file.
- Our system will only process the first one and disregard all others
- Maximum capacity = 10 PDF files or 30 MB
- Provide all necessary information on the shipping notice
- Only shipping notices for orders received via Procuros will be processed - others will be rejected.
- If your shipping notice wasn’t processed, you will receive an email with the explanation. If this email directs you to the portal, please follow the instructions there.
Header Information
Header Information
This section provides all mandatory information to identify the corresponding order and parties and when to expect the shipment.
- Shipping Notices number
- Shipping Notices date (default is the current date)
- Order number
- Expected Delivery Date
- Actual Shipment Date (default is the requested delivery date)
- Buyer
- Supplier
- Delivery address
Transport Units information
Transport Units information
This section is not mandatory. But if you decide to fill in information, you should do it fully, otherwise the system will block your shipping notice. Therefore, we advise you to fill it in only if you have information for all the bullet points mentioned below.Add a Shipping Unit
- Index
- NVE/SSCC (18-digit identification number)
- Unit Type (pallet, container, carton, etc.)
- Carrier
- Tracking Number
- Tracking Link
Line-item level Information
Line-item level Information
This section is mandatory. It provides all necessary information for each line item.
Beauty
Beauty
- Order-line Number *
- GTIN / EAN **
- Article Name (same as on the order) *
- Supplier Article Number *
- Shipped Quantity *
Fashion
Fashion
- Order-line Number *
- GTIN / EAN **
- Article Name (same as on the order) *
- Supplier Article Number *
- Shipped Quantity *
Food
Food
- Order-line Number *
- GTIN / EAN **
- Article Name (same as on the order) *
- Supplier Article Number *
- Shipped Quantity *
- Batch Information (if has expiration date)
- Batch-ID
- Expiration Date
- Quantity
- Net Weight