Creating Trading Partner GLNs
Open customer card
Open a customer’s customer card and add or change addresses by clicking on the “plus” sign.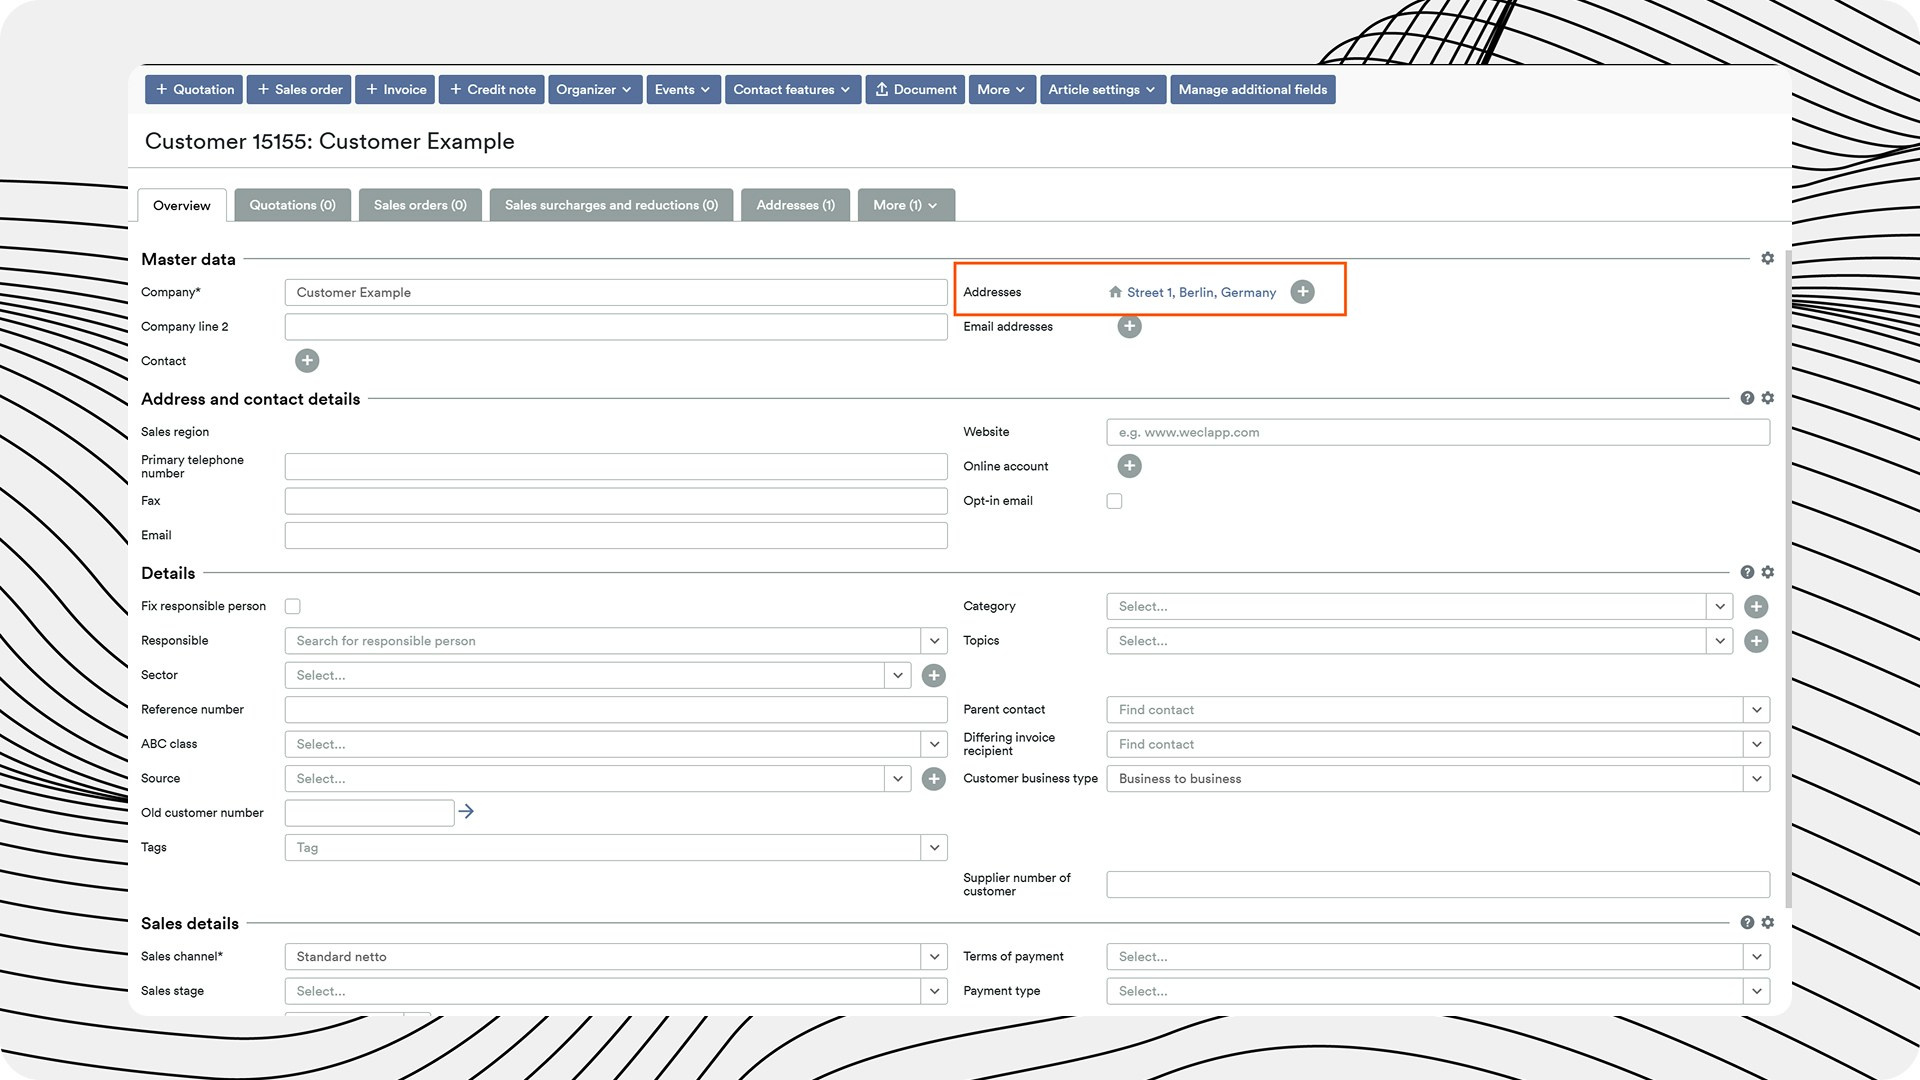
Check relevant fields
Check all boxes relevant to this address. Pay attention to different billing or delivery addresses. These must be created separately - details can be found in the official Weclapp documentation.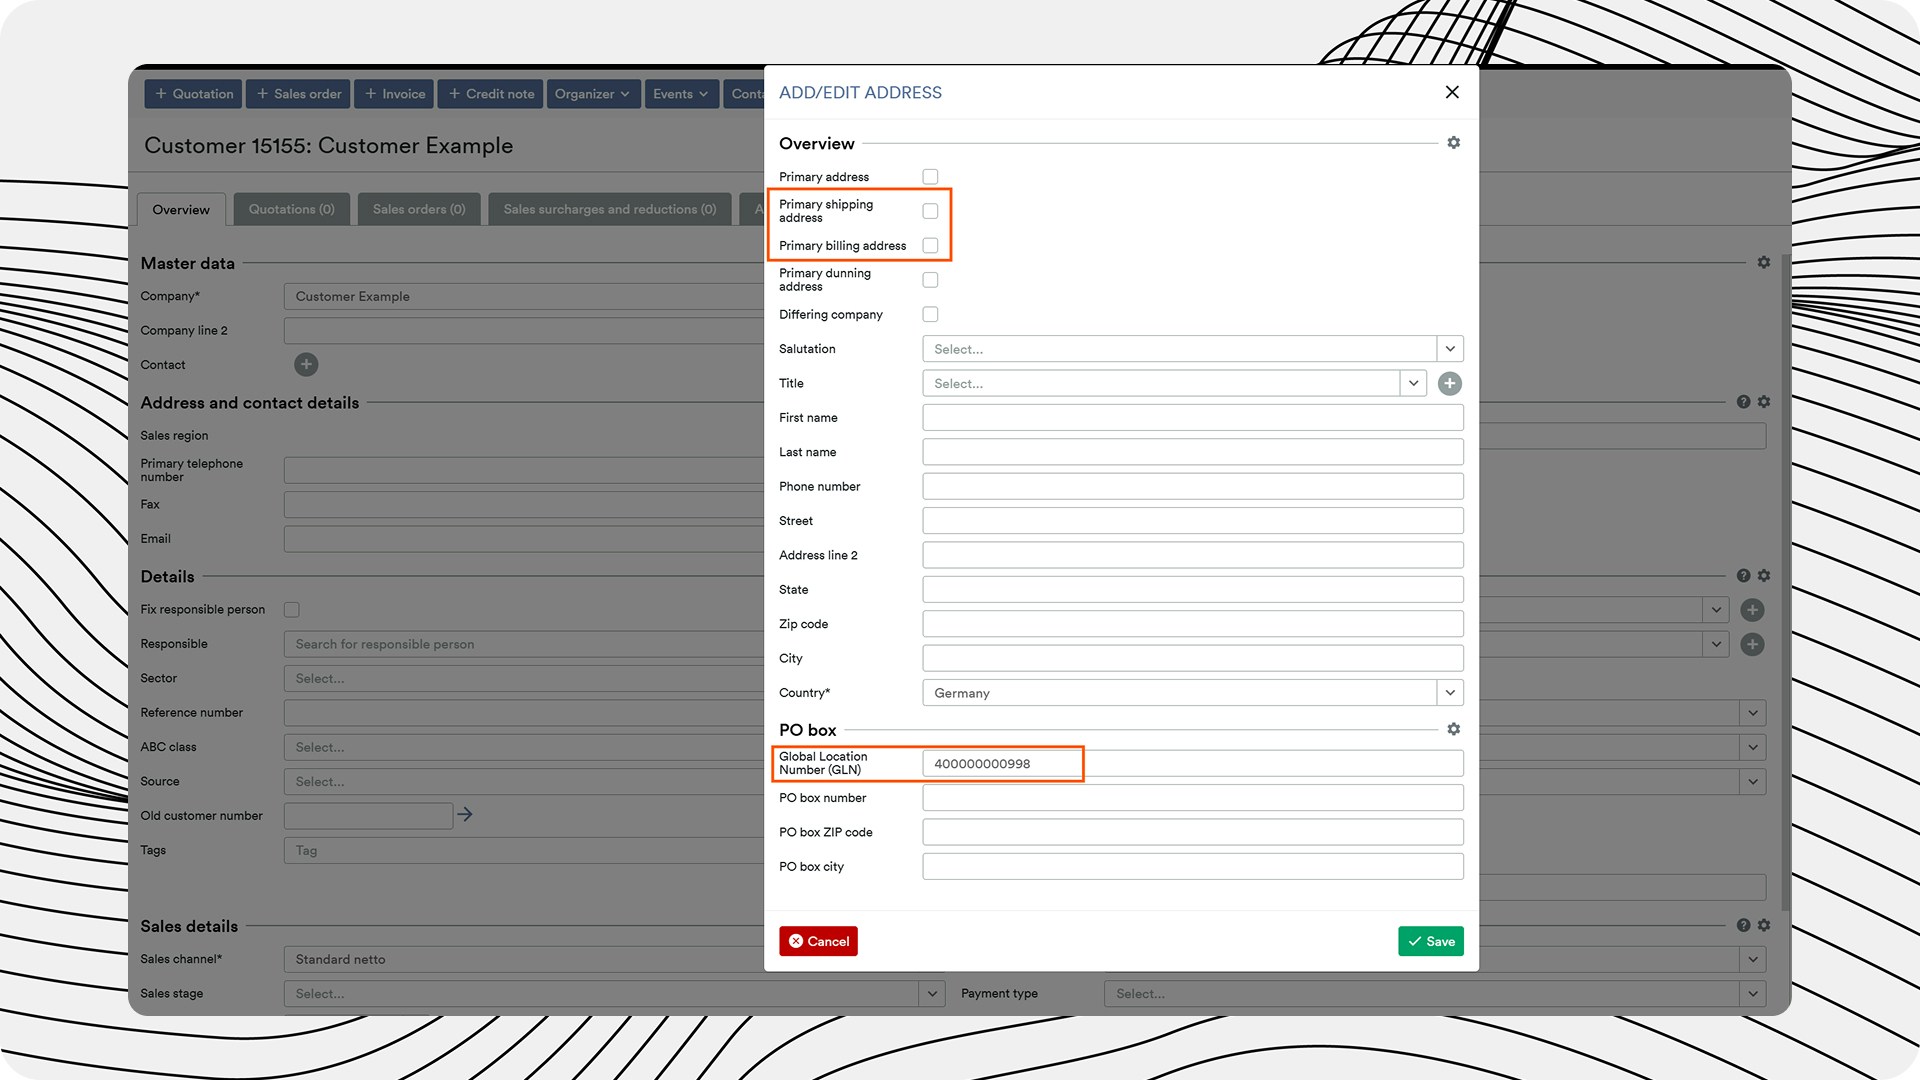
Creating Trading Partner Sales Tax IDs

The correct setup of the VAT ID is particularly important for the correct tax treatment in cross-border trade.
Master Data Checklist
Use this checklist to ensure that all necessary master data is correctly stored:Customer Master Data Checklist
Customer Master Data Checklist
- GLN stored for each trading partner
- GLN stored for different billing and delivery addresses
- VAT ID stored for each trading partner
- Procuros free field filled out with “CUSTOMER” value for each relevant trading partner