Setting up the fulfillment integration for 3PL documents
- The shipping instructions are sent to the fulfillment service provider (3PL) as soon as the corresponding delivery note has the status “created” in weclapp
- As soon as the fulfillment service provider (3PL) sends a shipping instruction feedback to weclapp, the status of the corresponding delivery note in weclapp is automatically changed to “sent”
Setting Up Warehouse
1
Create warehouse
A warehouse must be set up in weclapp for each fulfillment service provider. In this way, Procuros can distinguish between different fulfillment service providers and the associated warehouses.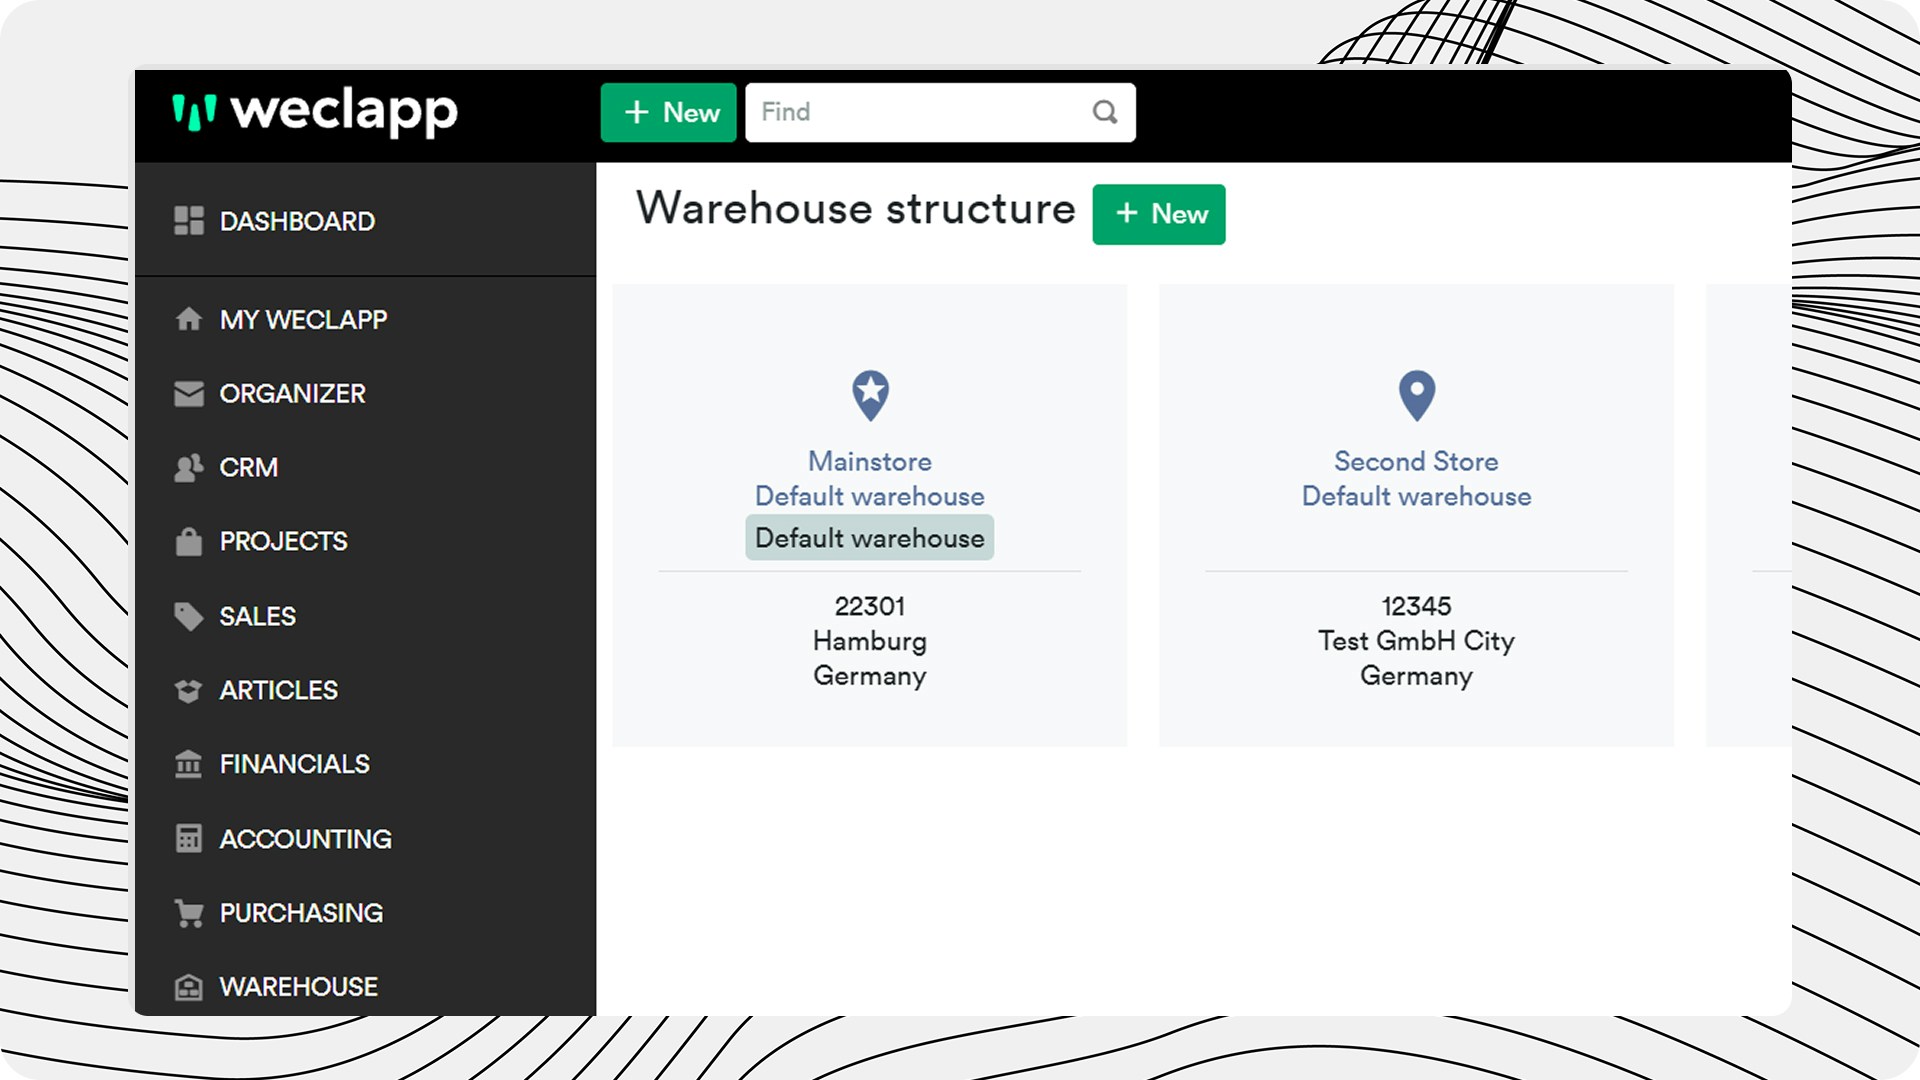
2
Navigate to warehouse settings
Go to Settings → Warehouse and create / edit a warehouse entity.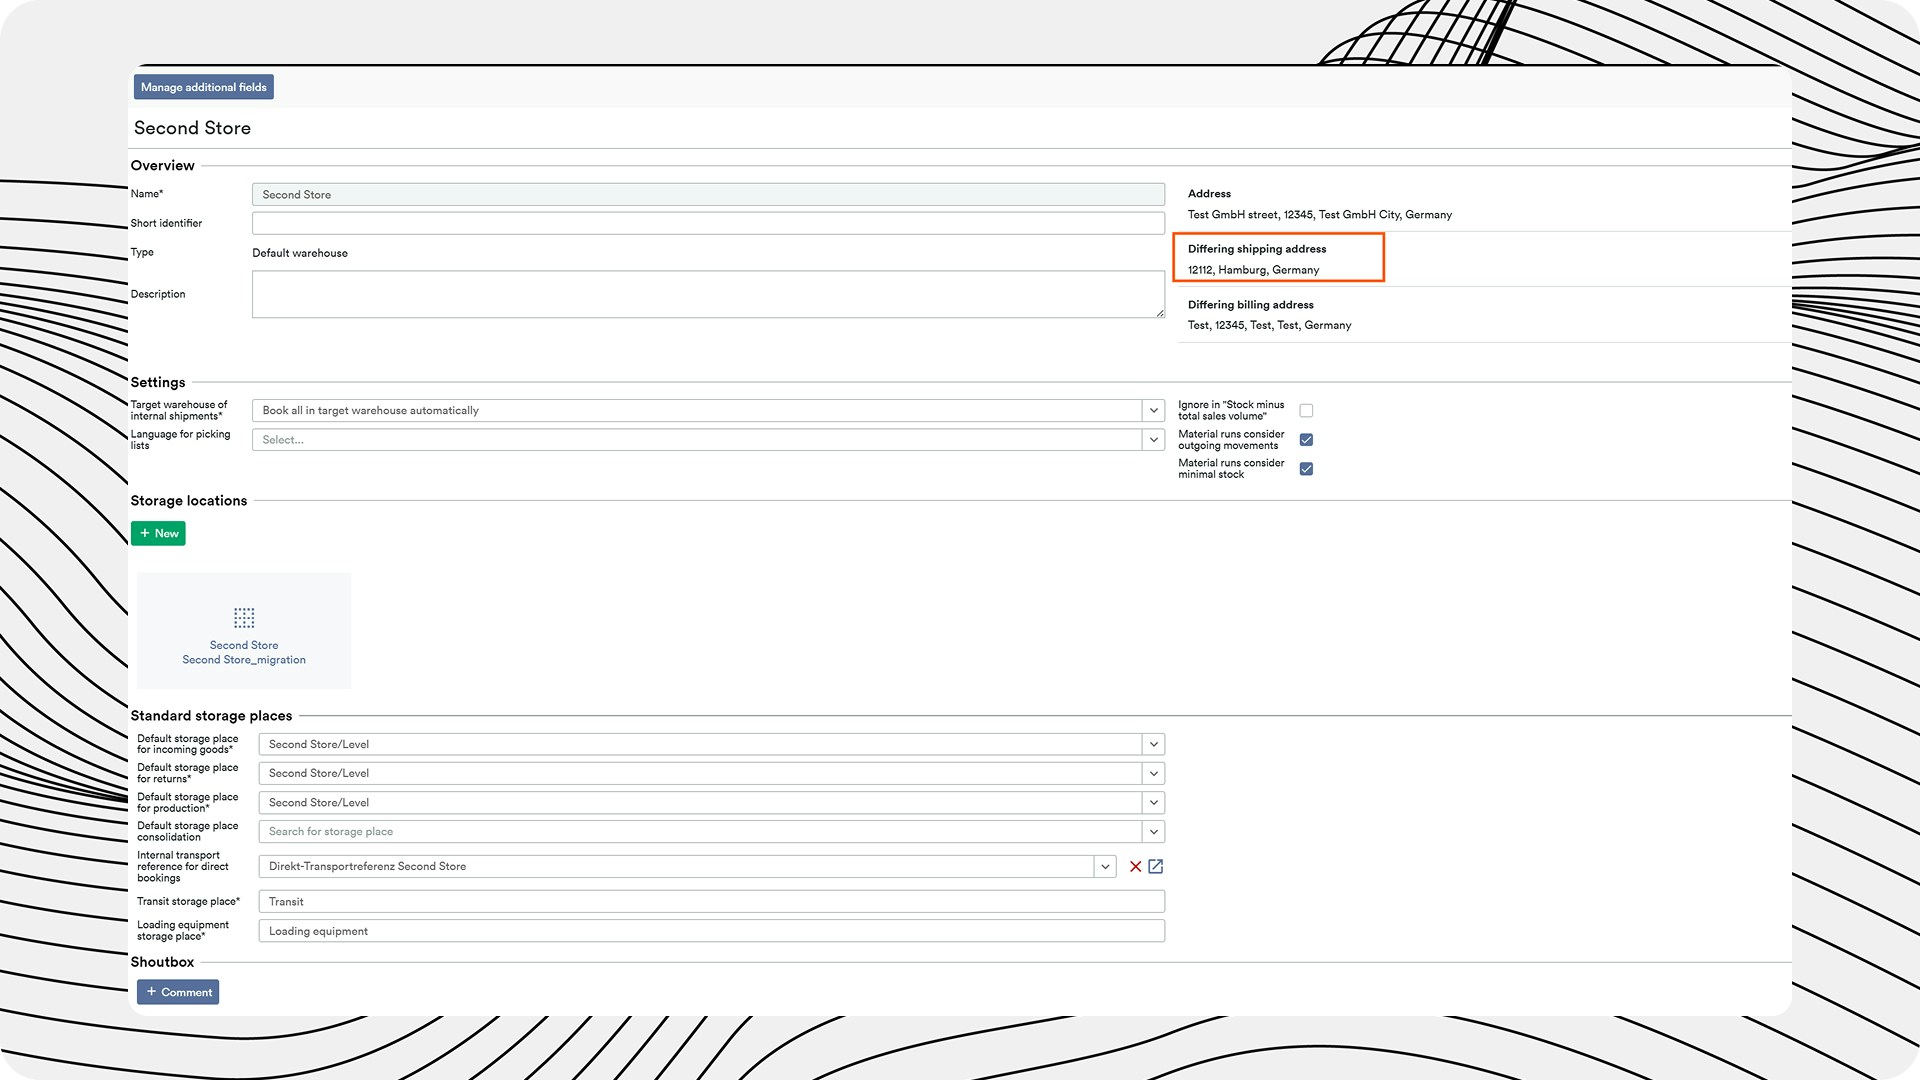
3
Add details
Add all the required details:
- Warehouse name
- The delivery address of the Warehouse
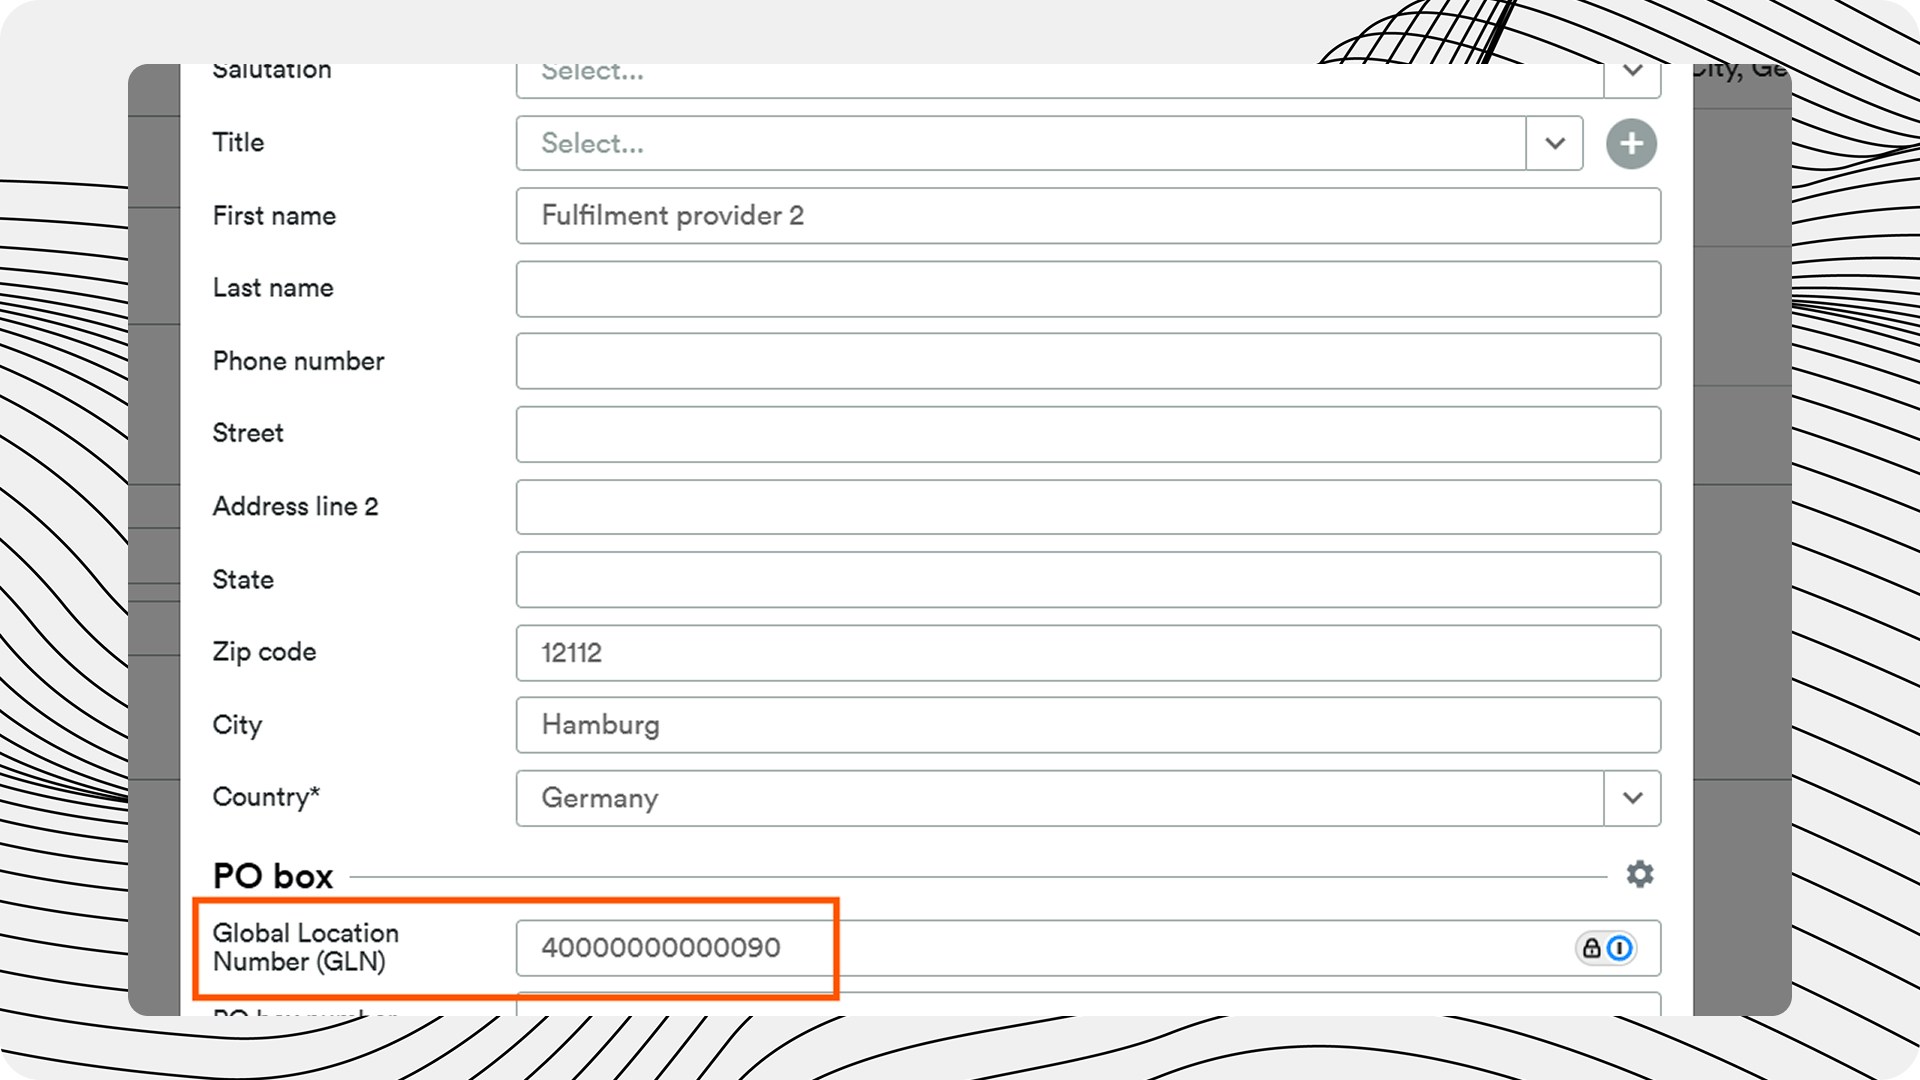
-
GLN - without the GLN, Procuros will not be able to send the document to the correct Fulfiller
4
Transmit warehouse ID
Please then send the relevant warehouse identifier (“ID”) to Procuros. To do this, open the relevant warehouse and copy the ID that you can find in the URL. Procuros needs this information to identify the specific Warehouse.
Sending a Dispatch Instruction
1
Check status
Make sure the shipment is in weclapp status “Delivery note created”.
2
Check date
The shipment you choose for testing must have a “date” AFTER
activeFromDate.3
Select warehouse
Make sure the correct Warehouse / Lager is selected while creating the shipment.
4
Fill in mandatory fields
Ensure the following mandatory data fields are filled on the shipment:
- Customer order number
- Shipping date