> ## Documentation Index
> Fetch the complete documentation index at: https://docs.procuros.io/llms.txt
> Use this file to discover all available pages before exploring further.
# Setting Up Email Forwarding in Microsoft Outlook
> Learn how to automatically forward emails in Microsoft Outlook to Procuros to seamlessly process supplier documents and save time.
Automatically forwarding emails to Procuros enables processing of supplier documents such as orders, invoices, or shipping notices without manual entry. Procuros automatically extracts data from the forwarded documents, saving suppliers time and reducing errors.
This guide shows you how to set up automatic email forwarding in Microsoft Outlook for Windows.
If a fulfiller regularly sends shipping notices to your purchasing department, you can use automatic forwarding to ensure these documents are sent directly to Procuros and thus recorded completely and on time.
## Setting Up Email Forwarding in Outlook for Windows
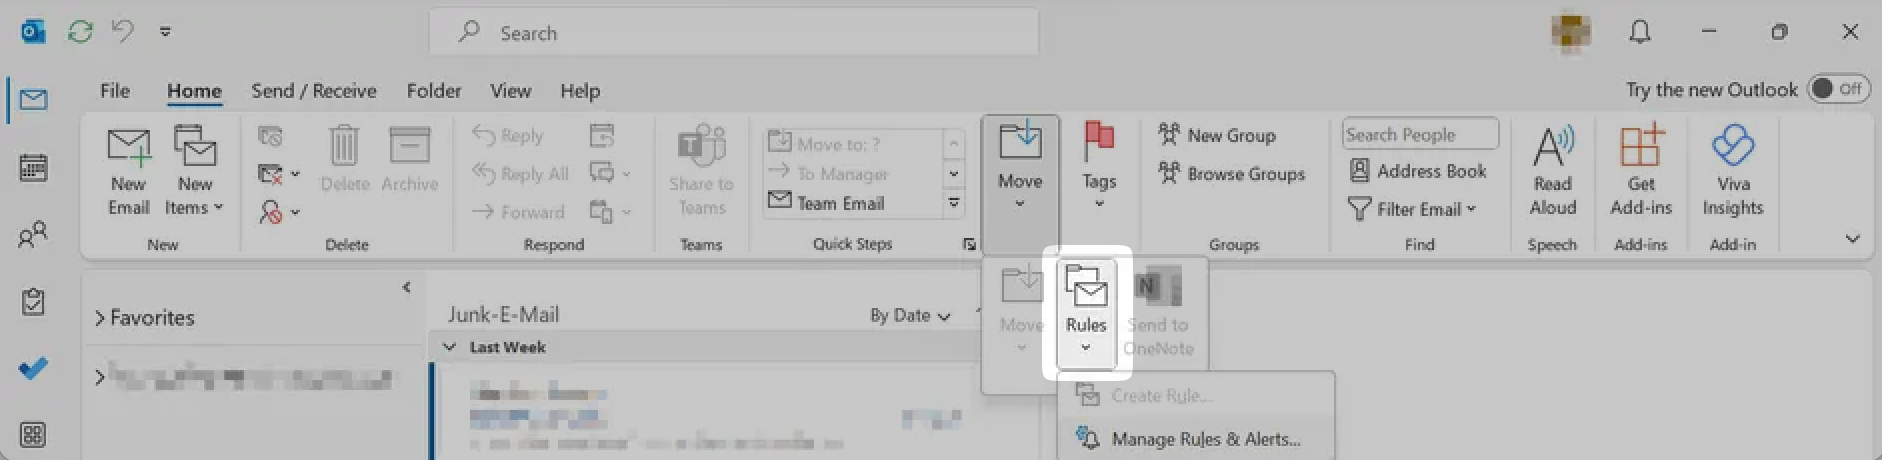
Select the "Home" tab in the main menu and then click on the "Rules" button in the "Move" section.
 Select "Manage Rules & Alerts" from the dropdown menu.
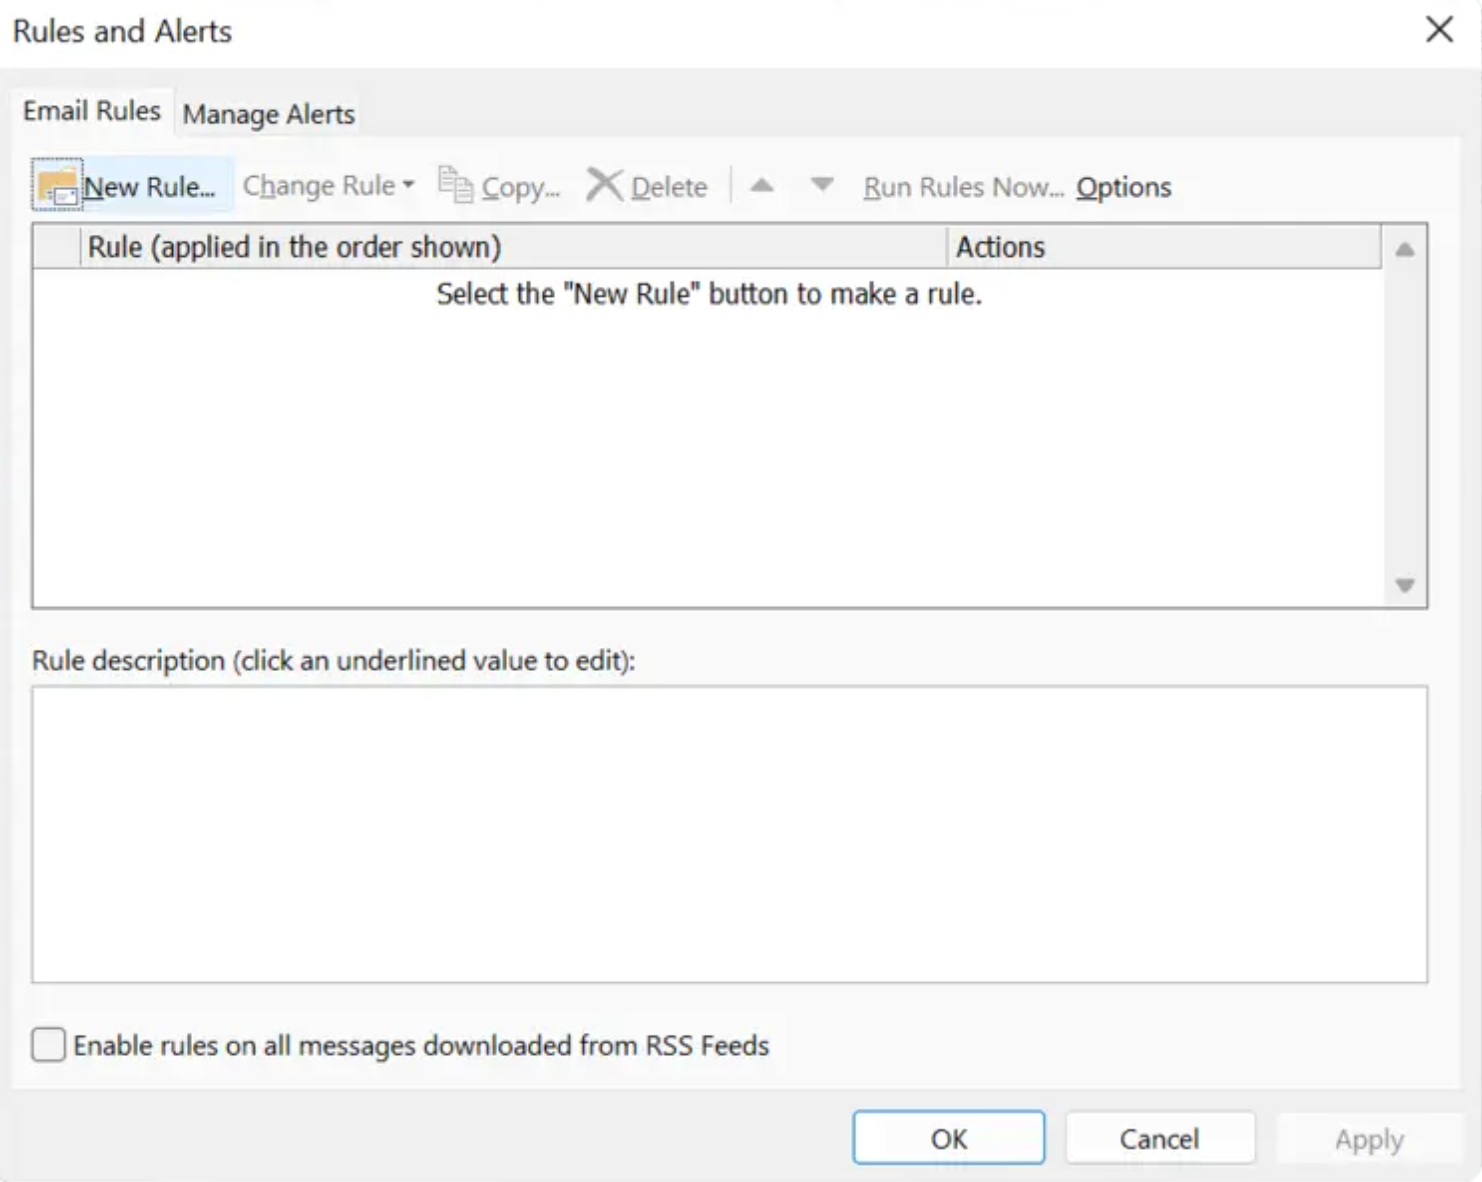
 In the "Rules and Alerts" dialog, select the "Email Rules" tab and click on the "New Rule" button.
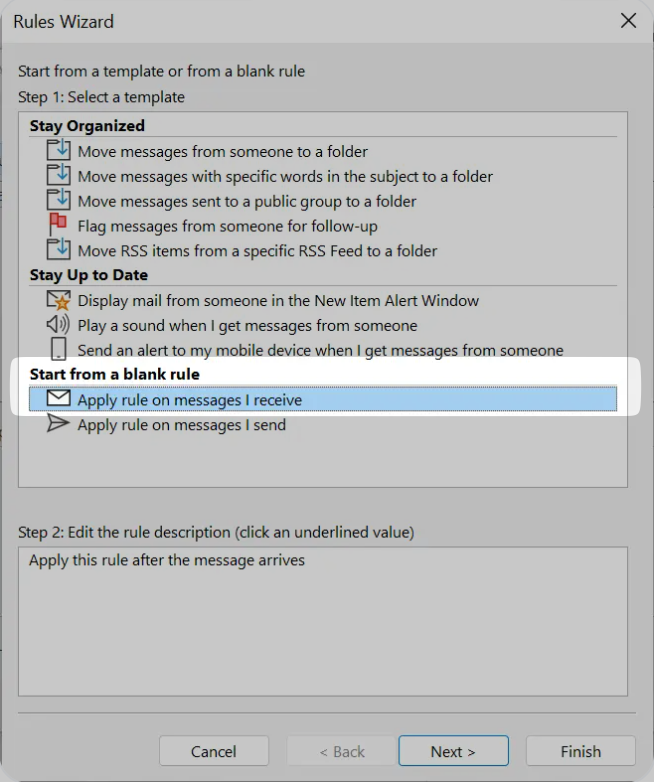
 The Rules Wizard will open. Under "Start from a blank rule," select "Apply rule on messages I receive" and click "Next."
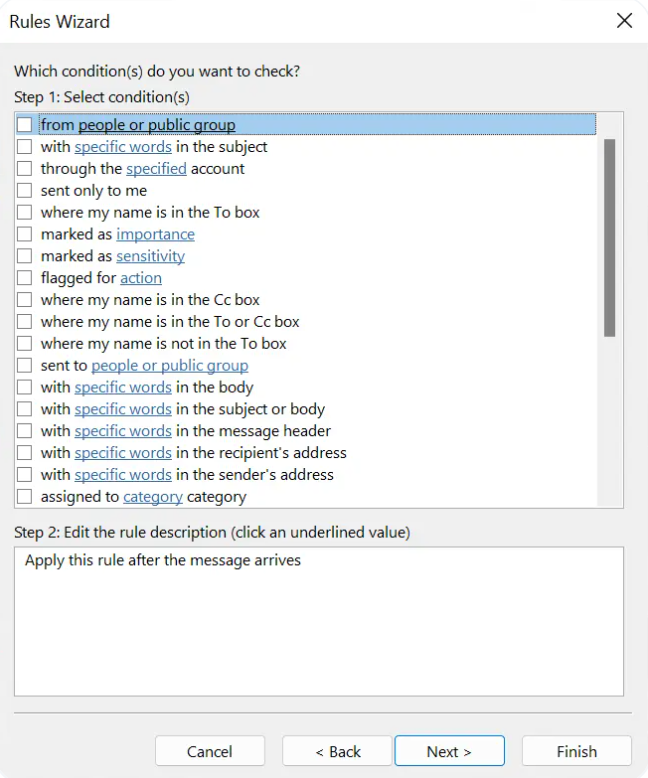
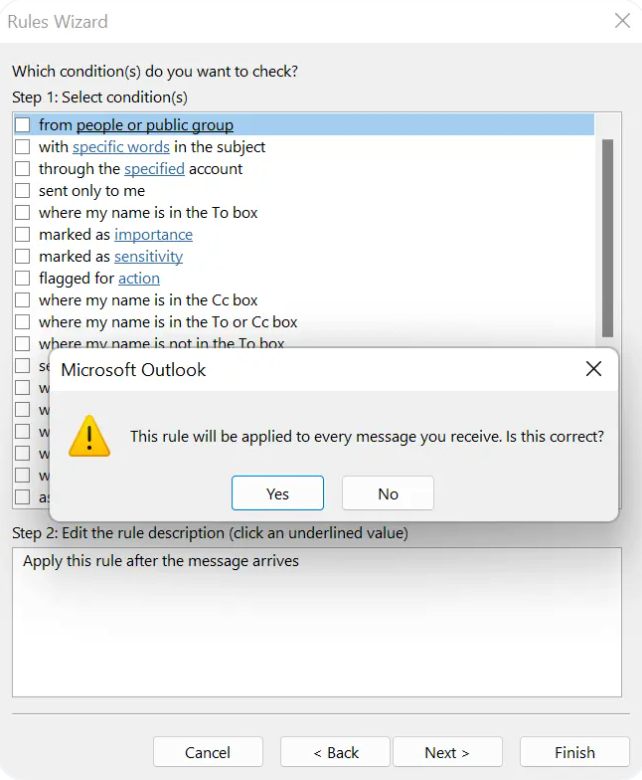
 Select the conditions by which emails should be filtered. If all incoming emails from a specific sender should be forwarded, check the appropriate box and specify the sender.
If you don't select any condition and click "Next," all incoming emails will be forwarded. Confirm this in the confirmation dialog.
Select the conditions by which emails should be filtered. If all incoming emails from a specific sender should be forwarded, check the appropriate box and specify the sender.
If you don't select any condition and click "Next," all incoming emails will be forwarded. Confirm this in the confirmation dialog.
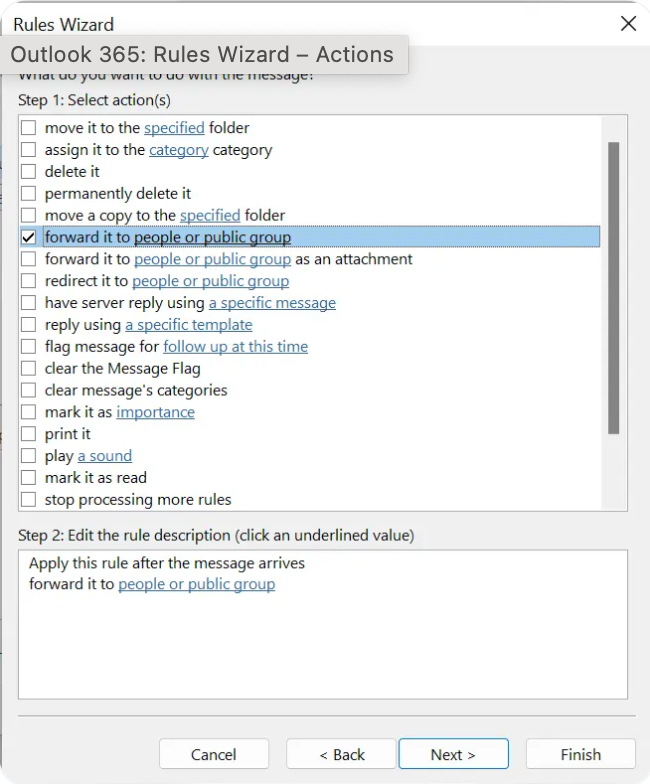
 Select "forward it to people or public group" as the action and click on the blue highlighted text to specify the target address.
 Enter the Procuros email address or select it from your address book. Click "OK" to confirm your selection.
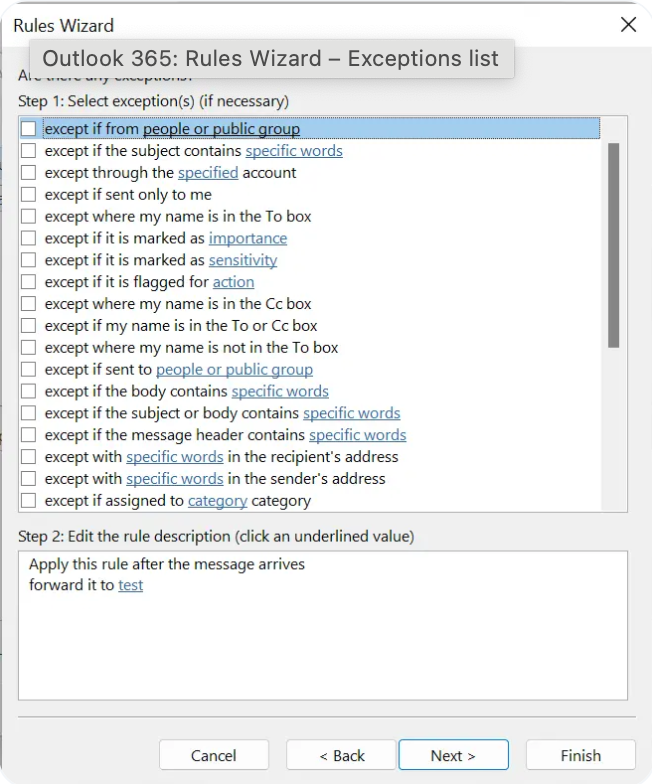
 If desired, you can set exceptions for the rule. For example, if certain emails should not be forwarded. Then click "Next."
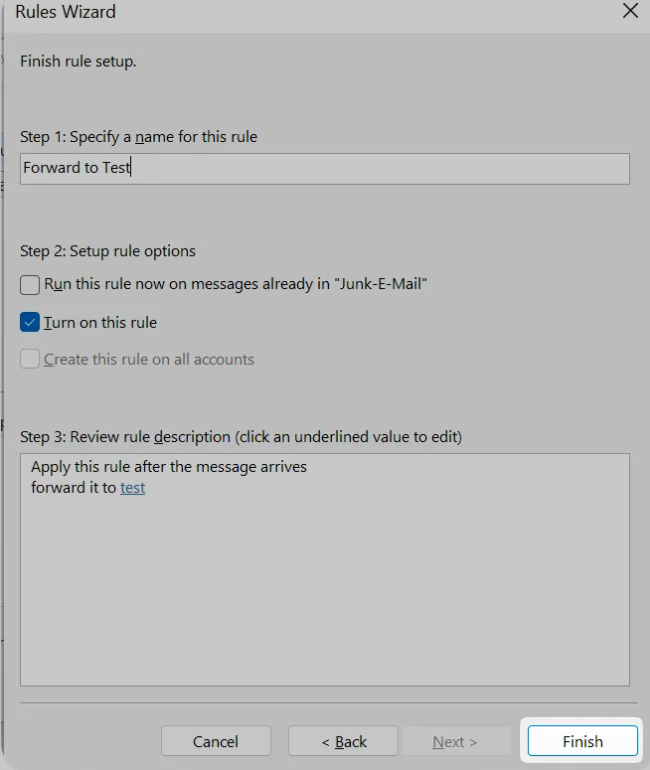
 Enter a name for the rule (e.g., "Forward shipping notices to Procuros") and ensure that the "Turn on this rule" option is selected. Then click "Finish."
 ## Difference Between Forwarding and Redirecting
Microsoft Outlook distinguishes between email forwarding and email redirection:
* **Forwarding**: The recipient of the forwarded message can see who originally sent the email. When you reply to a forwarded email, Outlook automatically selects the address that forwarded the email, not the original sender's address.
* **Redirecting**: The recipient of a redirected message does not see that the email was redirected. It appears as if the email was sent directly from the original sender. Replies to redirected emails go directly to the original sender, not to the account that redirected the email.
To ensure that Procuros receives all relevant information, we recommend using forwarding instead of redirecting, as this preserves the complete header information of the email.
## Verifying the Forwarding Setup
After setting up the rule, you should test the forwarding:
1. Send a test email to the account for which you have set up forwarding
2. Check if the email is correctly forwarded to the Procuros address
3. Verify in the Procuros portal that the document has been processed correctly
Make sure that the forwarding rule you've set up doesn't conflict with other rules. If emails are not being forwarded, check the order of your rules in the "Rules and Alerts" dialog.
## Benefits of Automatic Forwarding to Procuros
Automatic forwarding offers the following benefits:
* Time savings by eliminating manual data entry
* Reduction of errors in document processing
* Increased transparency in the supply chain
* Ensuring all important documents are captured in the Procuros system
* Improved response time to changes or issues
## Difference Between Forwarding and Redirecting
Microsoft Outlook distinguishes between email forwarding and email redirection:
* **Forwarding**: The recipient of the forwarded message can see who originally sent the email. When you reply to a forwarded email, Outlook automatically selects the address that forwarded the email, not the original sender's address.
* **Redirecting**: The recipient of a redirected message does not see that the email was redirected. It appears as if the email was sent directly from the original sender. Replies to redirected emails go directly to the original sender, not to the account that redirected the email.
To ensure that Procuros receives all relevant information, we recommend using forwarding instead of redirecting, as this preserves the complete header information of the email.
## Verifying the Forwarding Setup
After setting up the rule, you should test the forwarding:
1. Send a test email to the account for which you have set up forwarding
2. Check if the email is correctly forwarded to the Procuros address
3. Verify in the Procuros portal that the document has been processed correctly
Make sure that the forwarding rule you've set up doesn't conflict with other rules. If emails are not being forwarded, check the order of your rules in the "Rules and Alerts" dialog.
## Benefits of Automatic Forwarding to Procuros
Automatic forwarding offers the following benefits:
* Time savings by eliminating manual data entry
* Reduction of errors in document processing
* Increased transparency in the supply chain
* Ensuring all important documents are captured in the Procuros system
* Improved response time to changes or issues