> ## Documentation Index
> Fetch the complete documentation index at: https://docs.procuros.io/llms.txt
> Use this file to discover all available pages before exploring further.
# How to connect your Weclapp instance to Procuros
> Step by step guide to setup your technical connection between your Weclapp and Procuros
## Setting Up Authentication
The *Procuros Weclapp Connector* must be granted access to your Weclapp system so that Procuros can automatically process your business documents. The following instructions will help you create the correct access data and make the necessary configurations.
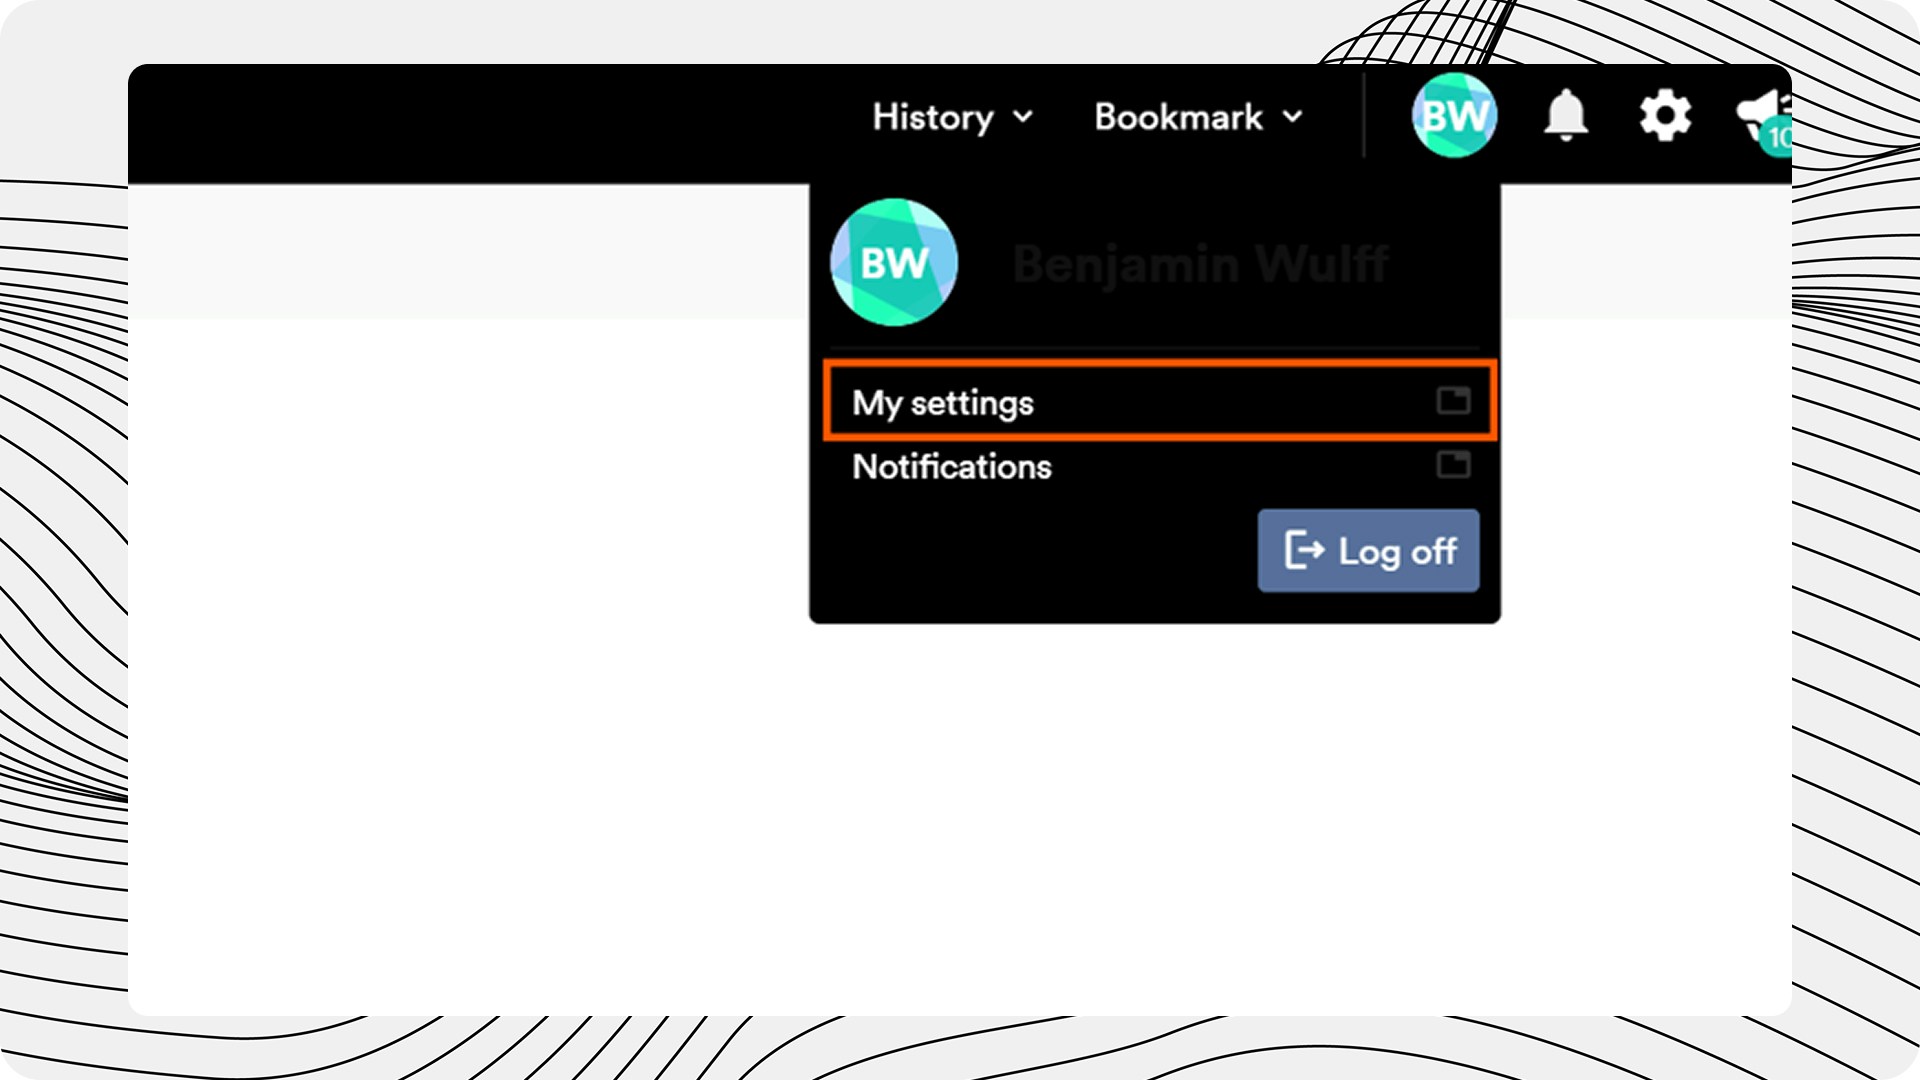
Click on your initials in the top right corner to access the Weclapp settings.
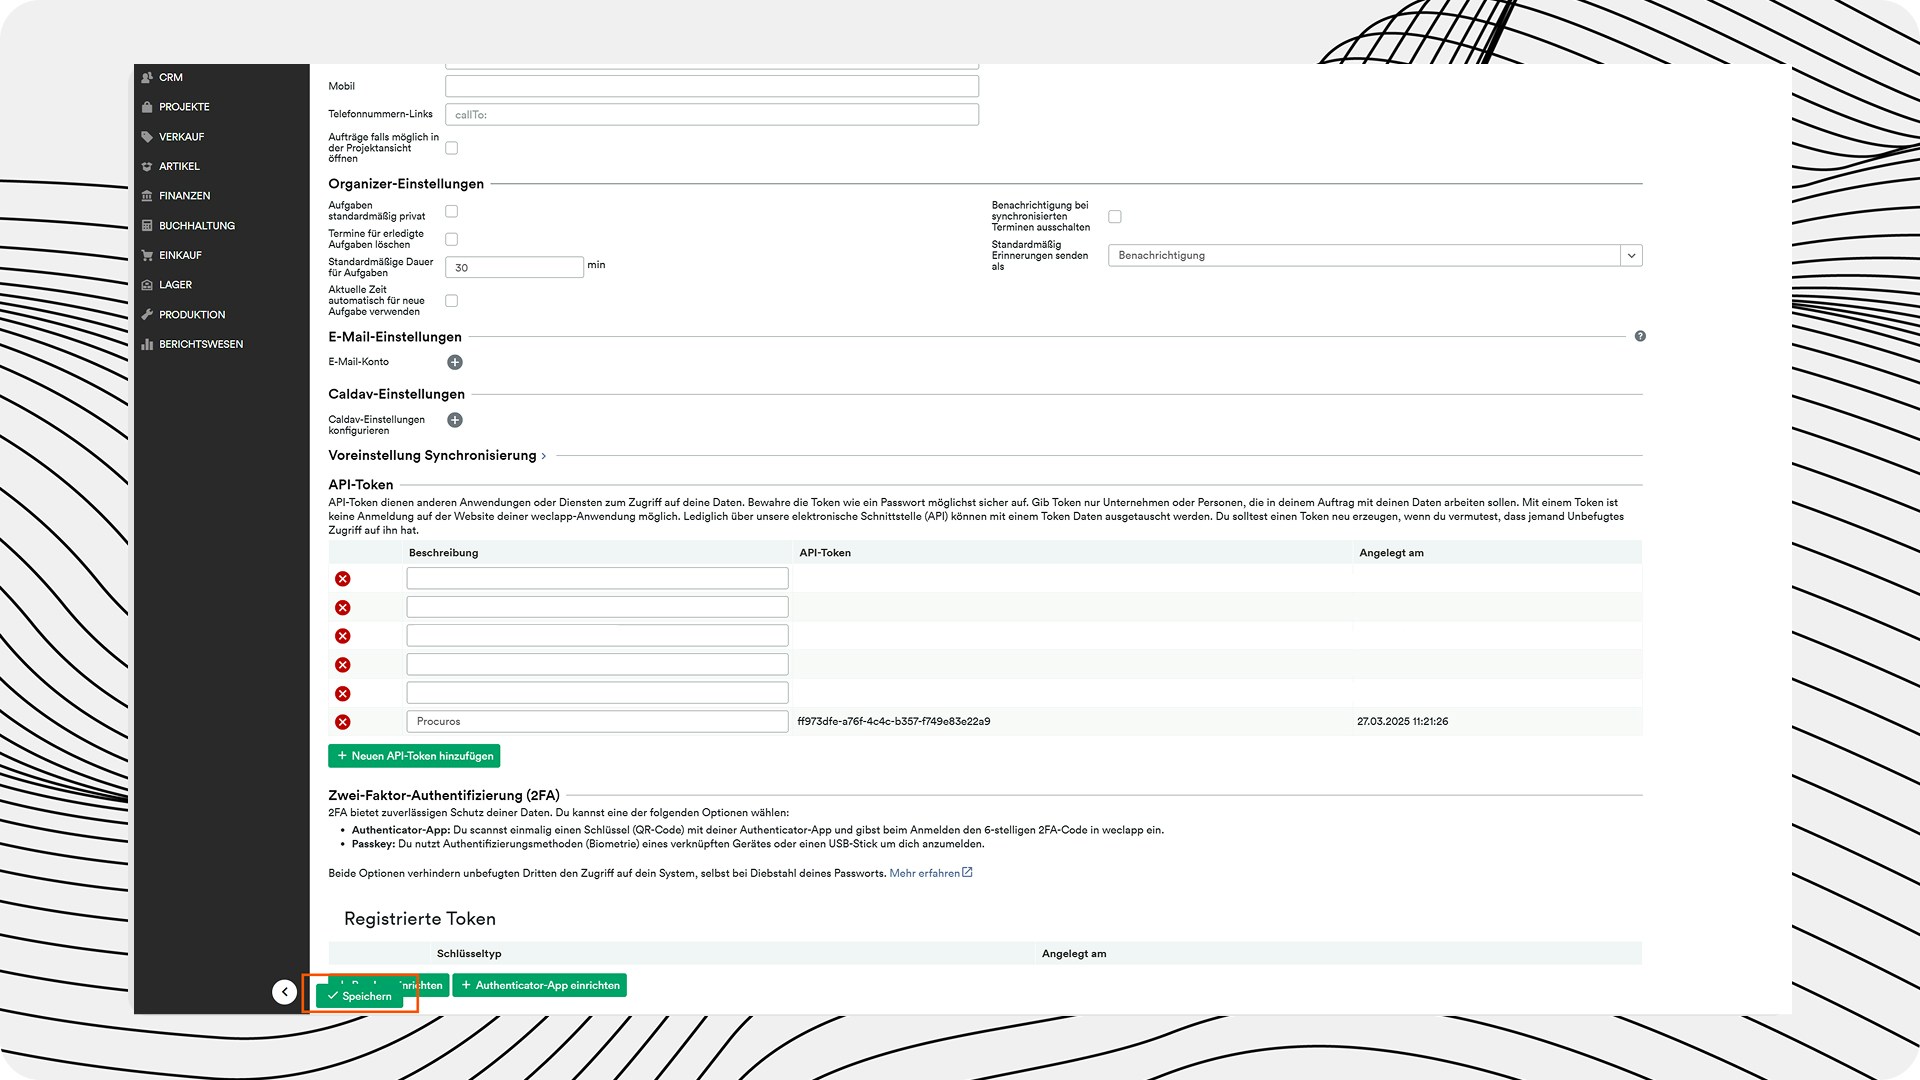
 Create a new API token for the Procuros integration.
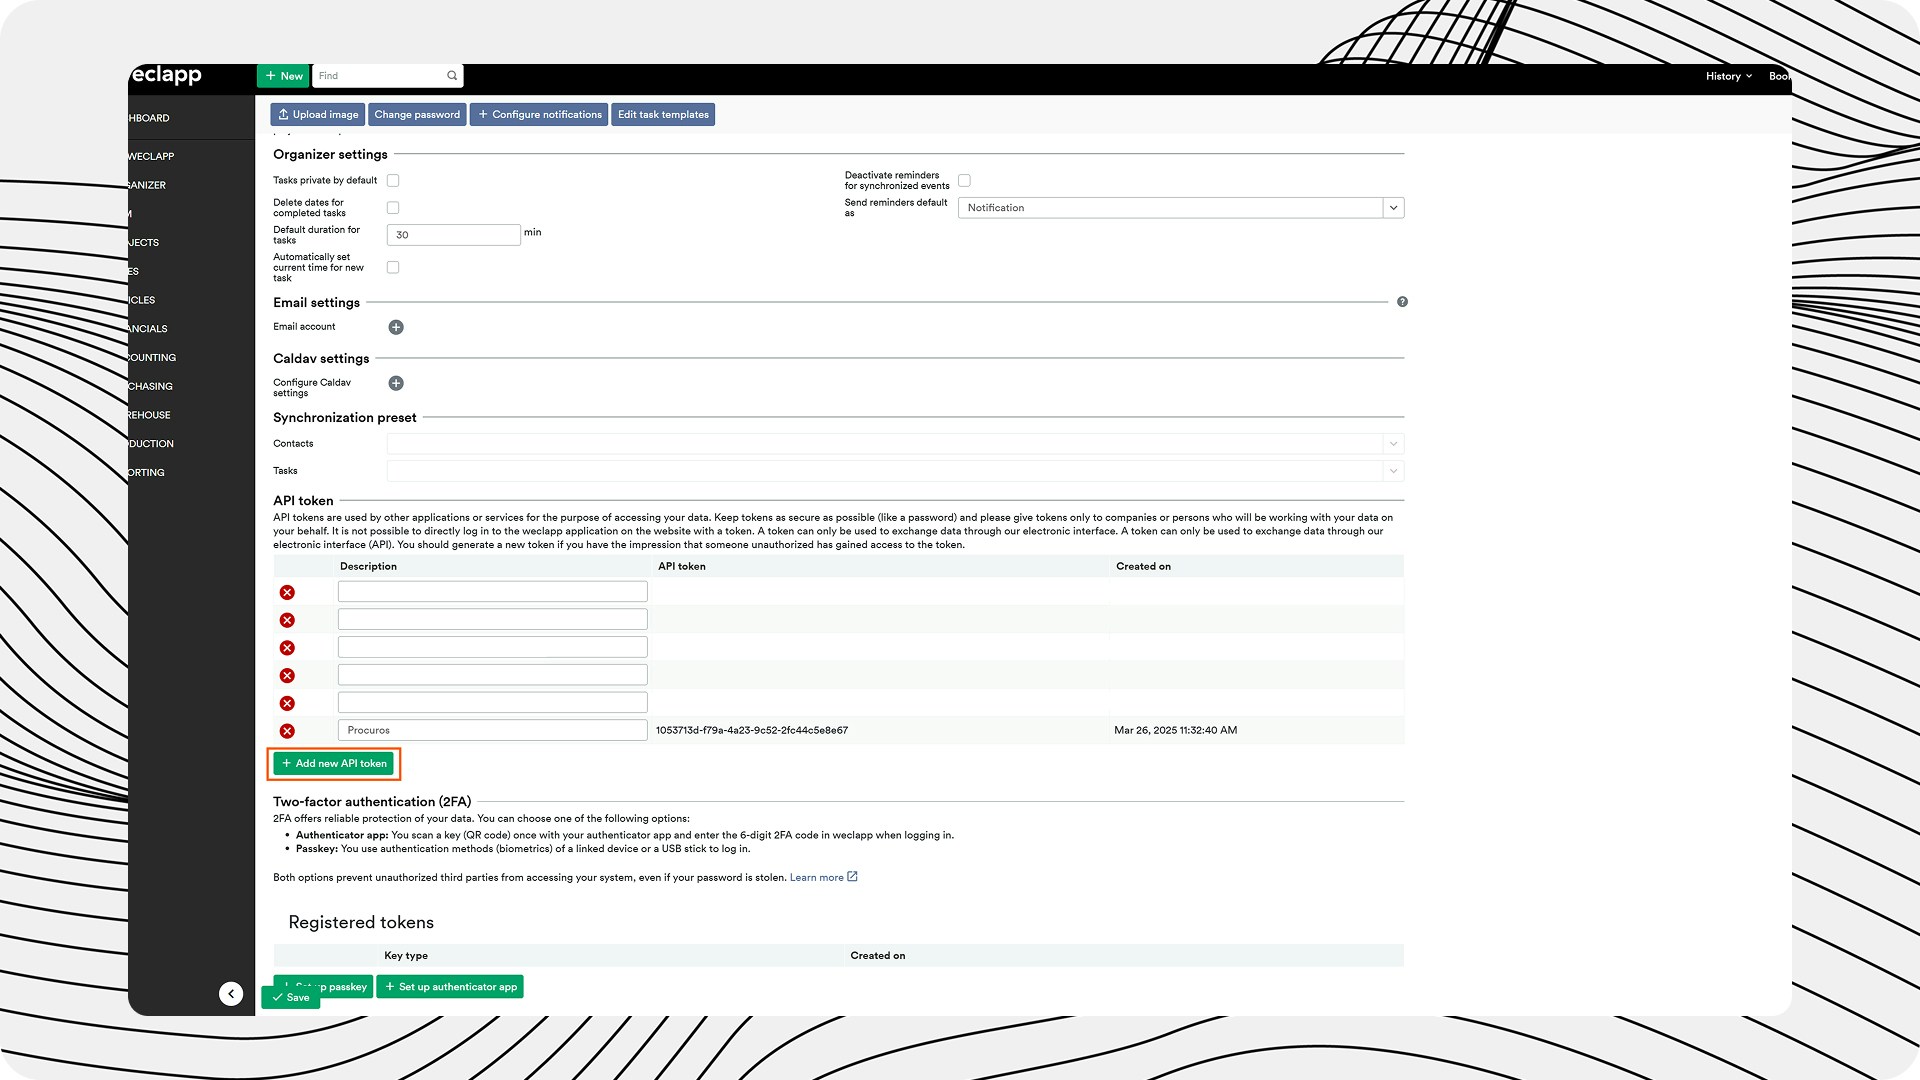 Create a new API name, e.g., "Procuros".
 Save the new API token.
 Please provide Procuros with the following information (ideally through the portal, alternatively via the onboarding form):
* *Weclapp API-URL* → copy from the browser line
* *Weclapp API name*
* *Weclapp API token*
## Setting Up Procuros Free-field
The default Procuros setup is that all documents correctly created will be sent to a Trade Partner for which you are connected with. If you prefer to filter/send only certain documents for a Business Relationship with a Trade Partner, you will need to configure a Free-field.
Navigate to Settings ("Gear") and click "Additional Fields", then "Manage Additional Fields". This usually requires a user with administration rights.
Please provide Procuros with the following information (ideally through the portal, alternatively via the onboarding form):
* *Weclapp API-URL* → copy from the browser line
* *Weclapp API name*
* *Weclapp API token*
## Setting Up Procuros Free-field
The default Procuros setup is that all documents correctly created will be sent to a Trade Partner for which you are connected with. If you prefer to filter/send only certain documents for a Business Relationship with a Trade Partner, you will need to configure a Free-field.
Navigate to Settings ("Gear") and click "Additional Fields", then "Manage Additional Fields". This usually requires a user with administration rights.
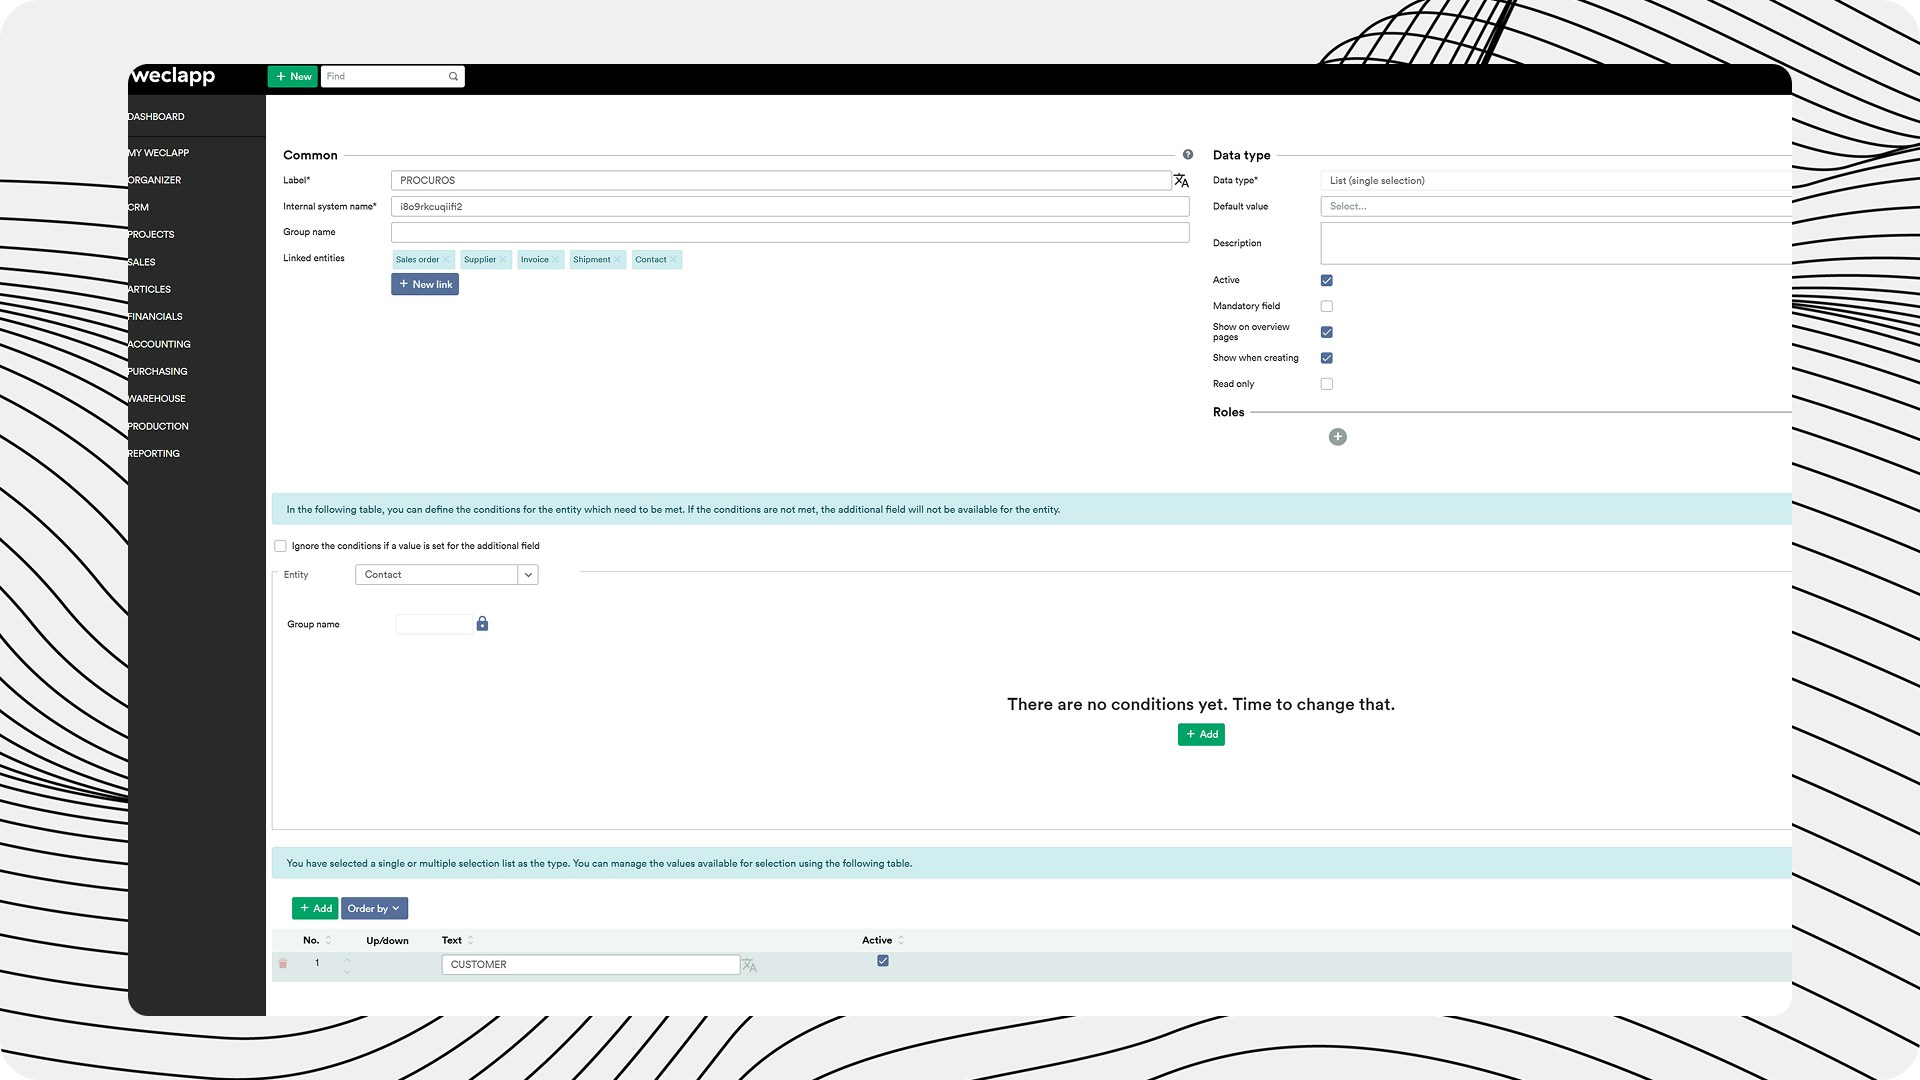
 Click on "+ New additional field".
.jpg?fit=max&auto=format&n=B4duGMjGkBbihGWc&q=85&s=77b0087cc0ea85725dedff693661def9) Please enter the following setup values completely and then save them:
* Captions: PROCUROS
* Linked Entities (via "+ New Link"): Quote, Order, Order Line, Purchase Order, Purchase Invoice, Customer/Prospect, Vendor, Delivery, Invoice, Goods Receipt
* Data type: list (single selection)
* Active: yes
* Show on overview pages: yes
* Show when creating: yes
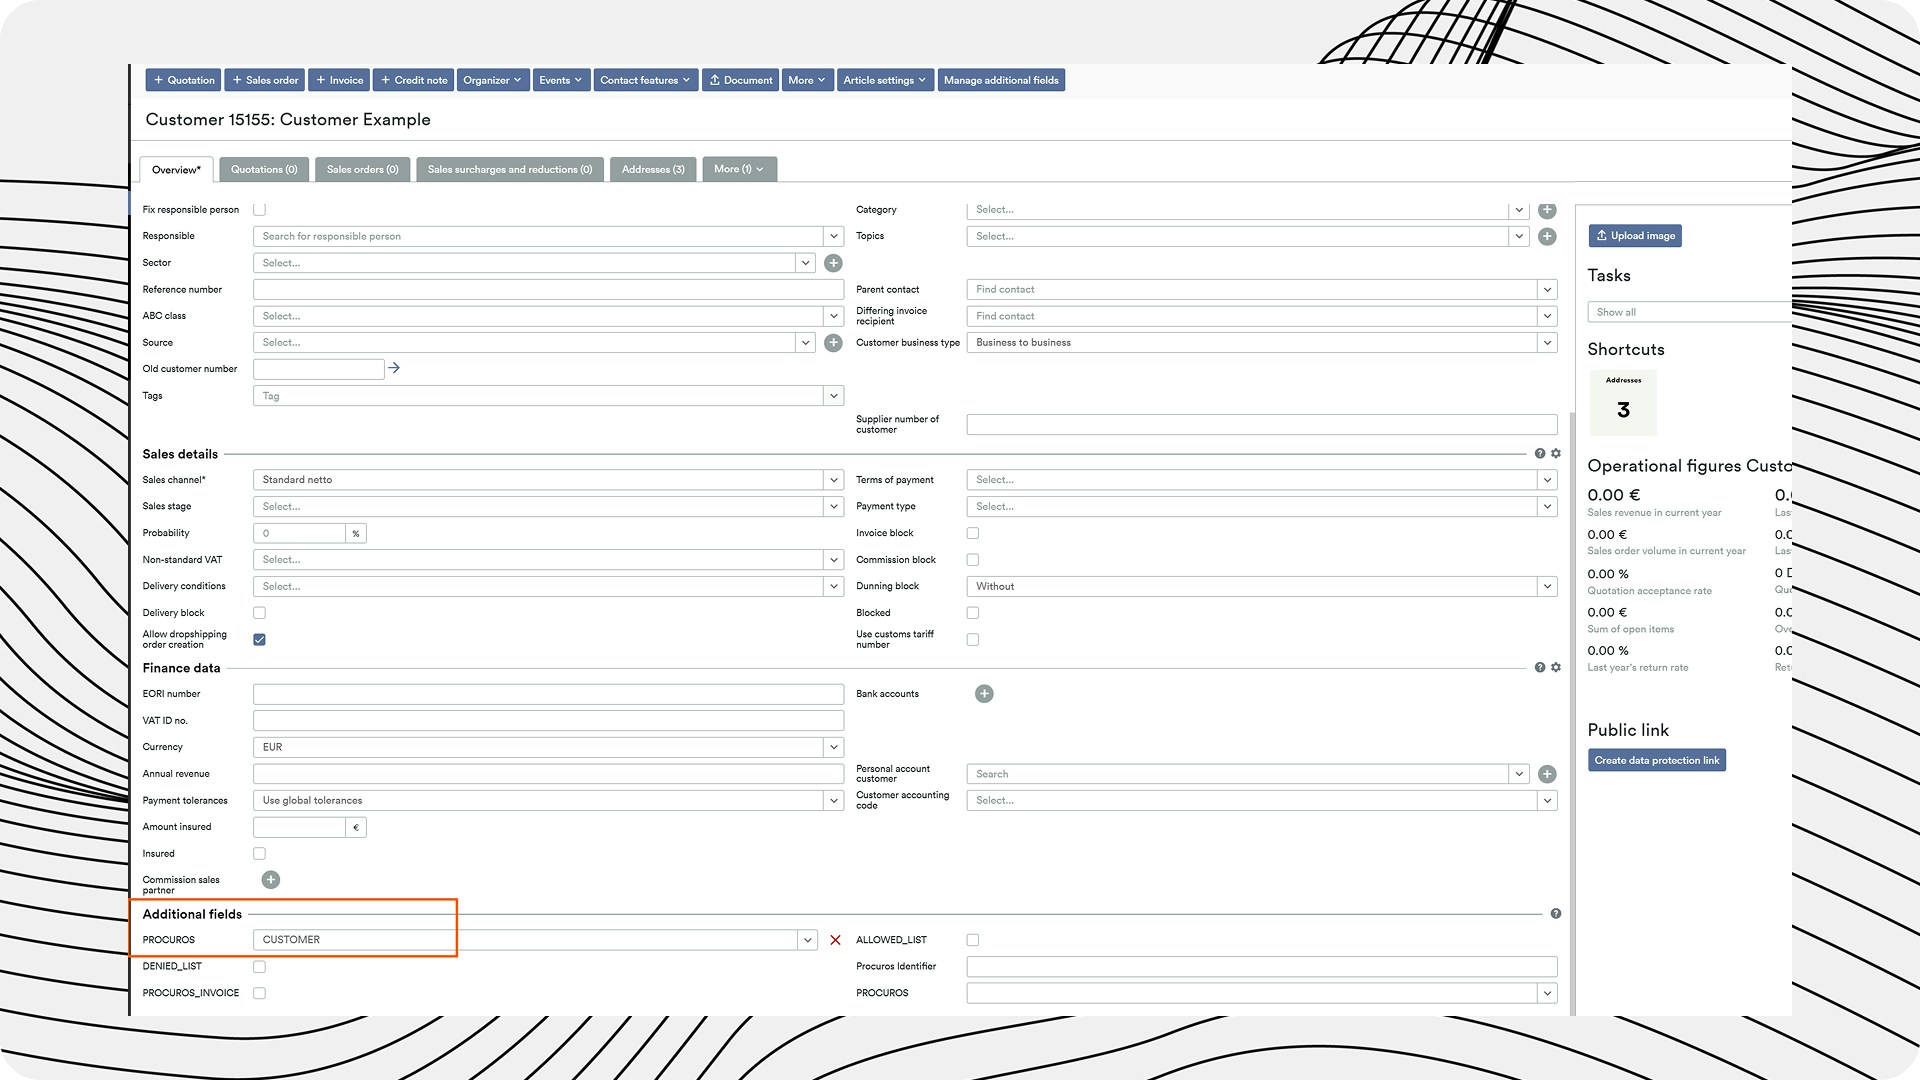
* Manage values (via "+ Add"): CUSTOMER
* Active: yes
Please enter the following setup values completely and then save them:
* Captions: PROCUROS
* Linked Entities (via "+ New Link"): Quote, Order, Order Line, Purchase Order, Purchase Invoice, Customer/Prospect, Vendor, Delivery, Invoice, Goods Receipt
* Data type: list (single selection)
* Active: yes
* Show on overview pages: yes
* Show when creating: yes
* Manage values (via "+ Add"): CUSTOMER
* Active: yes
 In the same view ("Manage additional fields") from the address line of the browser, please note the "entityID" value. Please pass this value on to Procuros.
For each trading partner/customer, please enter the value "Customer" in the Procuros free field that has just been created.
In the same view ("Manage additional fields") from the address line of the browser, please note the "entityID" value. Please pass this value on to Procuros.
For each trading partner/customer, please enter the value "Customer" in the Procuros free field that has just been created.
 Only Trade Partners/Documents marked with this Free-field will be pulled by the Procuros Weclapp Connector.
## Testing the Connection
After configuring the API credentials and the Procuros free field, a connection test should be performed:
1. Procuros sets up the connector with your access data
2. A test document is created to verify correct transmission
3. After successful verification, you will be informed about the operational connection
Ensure that all required information has been correctly transmitted to Procuros to ensure a successful connection.
## Troubleshooting
If problems occur during setup:
1. **API Access Rights**: Ensure that the created token has sufficient rights
2. **Free-field Configuration**: Check if the Procuros free field is correctly set up and assigned to trading partners
3. **Weclapp Version**: Confirm that your Weclapp version is compatible with the connector
If problems occur, contact the Procuros support team at [help@procuros.io](mailto:help@procuros.io) with a detailed description of the problem.
Only Trade Partners/Documents marked with this Free-field will be pulled by the Procuros Weclapp Connector.
## Testing the Connection
After configuring the API credentials and the Procuros free field, a connection test should be performed:
1. Procuros sets up the connector with your access data
2. A test document is created to verify correct transmission
3. After successful verification, you will be informed about the operational connection
Ensure that all required information has been correctly transmitted to Procuros to ensure a successful connection.
## Troubleshooting
If problems occur during setup:
1. **API Access Rights**: Ensure that the created token has sufficient rights
2. **Free-field Configuration**: Check if the Procuros free field is correctly set up and assigned to trading partners
3. **Weclapp Version**: Confirm that your Weclapp version is compatible with the connector
If problems occur, contact the Procuros support team at [help@procuros.io](mailto:help@procuros.io) with a detailed description of the problem.