> ## Documentation Index
> Fetch the complete documentation index at: https://docs.procuros.io/llms.txt
> Use this file to discover all available pages before exploring further.
# How to set up Discounts
> Step by step guide to setting up discounts in Weclapp
Weclapp allows for two types of discounts: Header level discount & Article level discount.
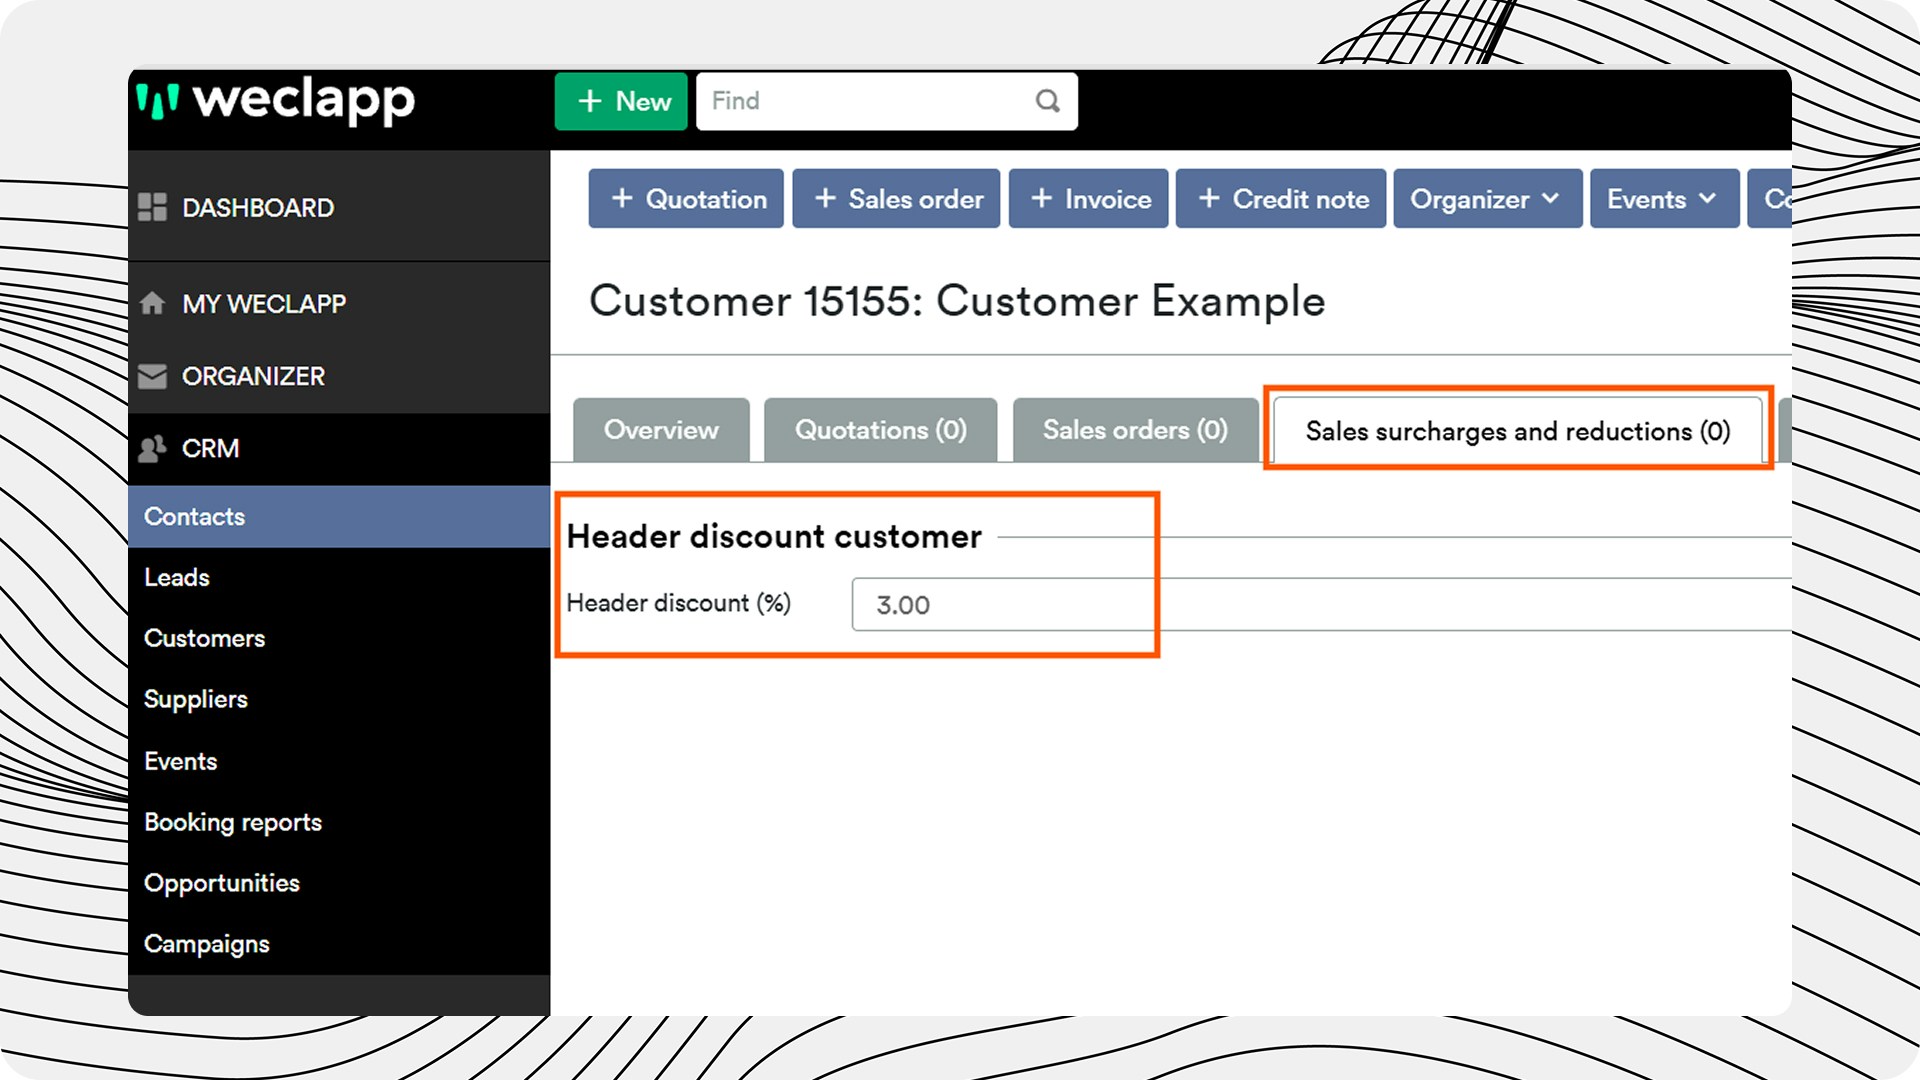
### Header Level Discount
* The Header level discount will apply to the whole document / all articles
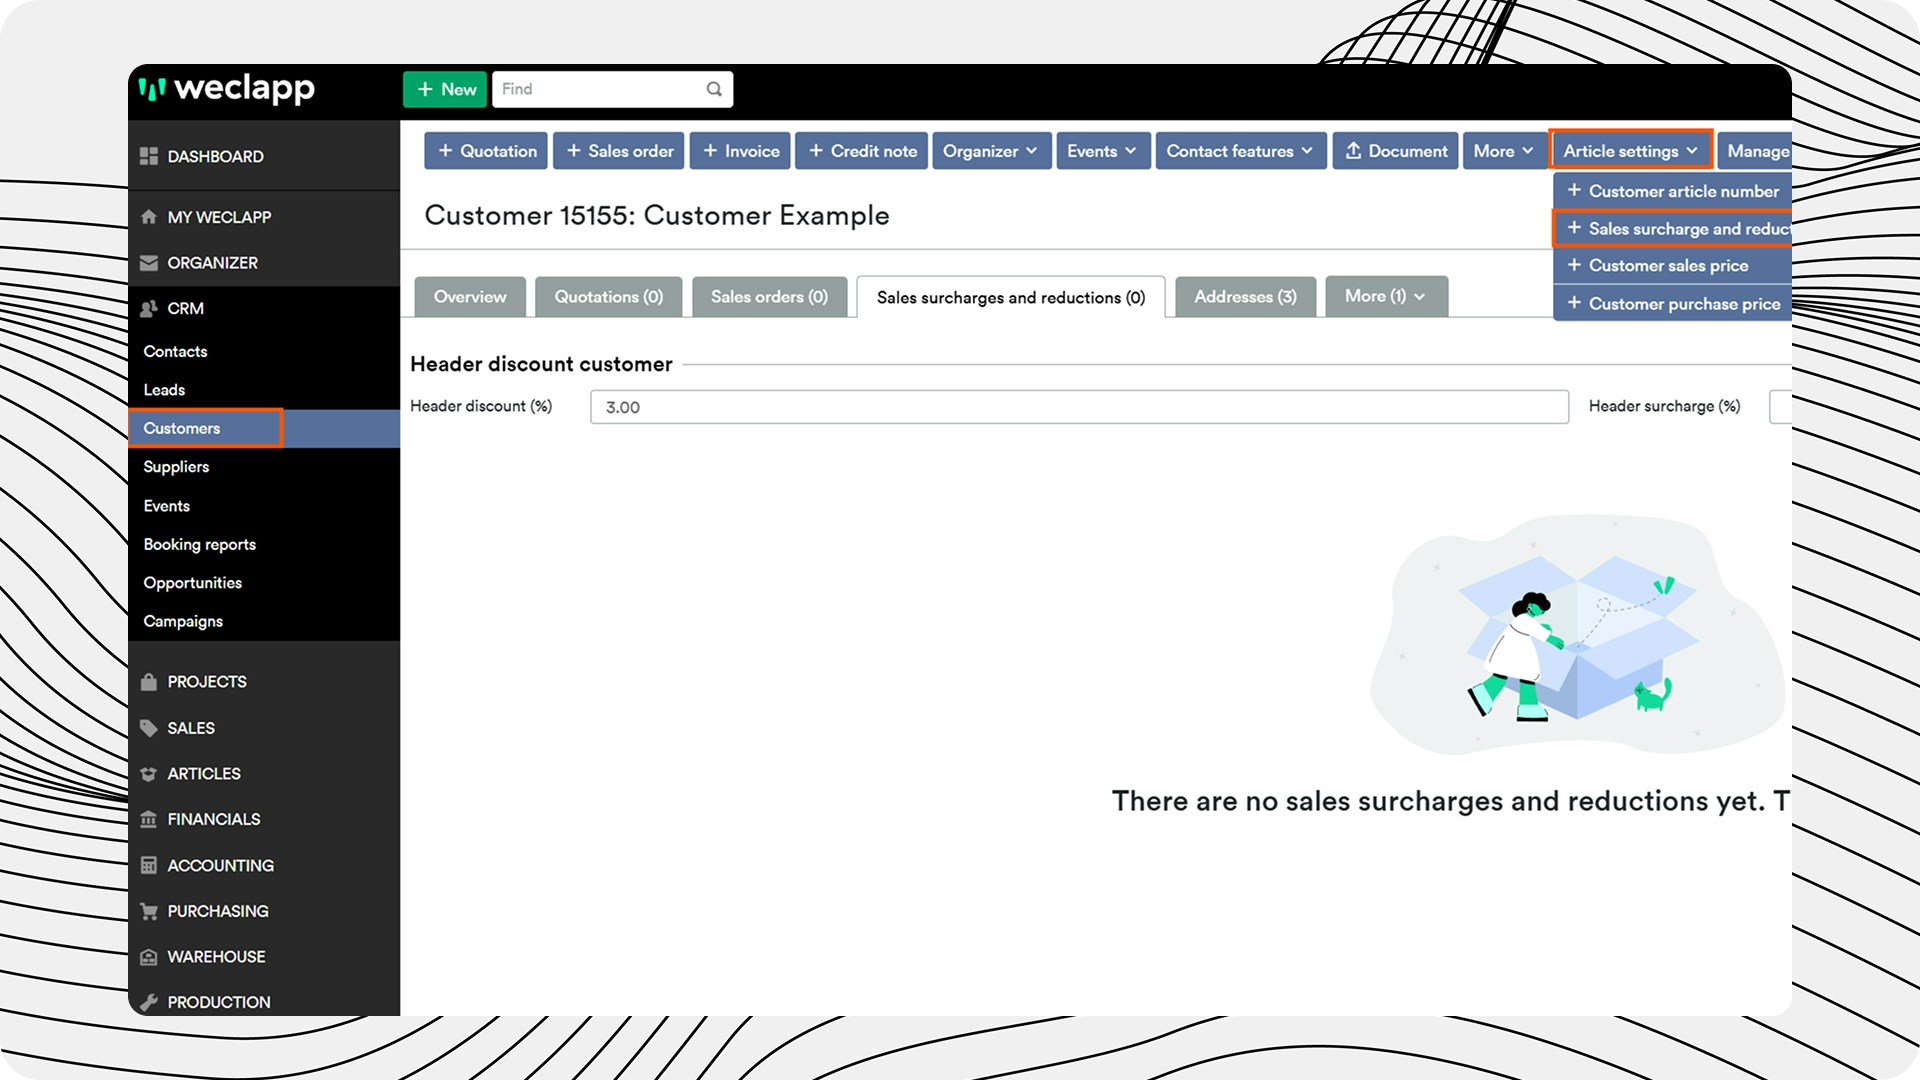
* You can create Header level discounts by going into the specific 'Customer Tab' → 'Sales surcharges and discounts' tab' and then apply them for the respective customer
* IMPORTANT: If your traded items include a deposit article (such as bottle deposit), the discount must be setup at item level so that the discount is not applied to the deposit amounts
 ### Item Level Discounts
A distinction is made between generally applicable Item Level discounts and trading partner-specific scenarios (option 1 & option 2). You then link the product groups to relevant articles.
**Option 1: General Discount - Applied to all Trade Partners**
The following describes how to create discounts for material groups that apply to **all** business partners.
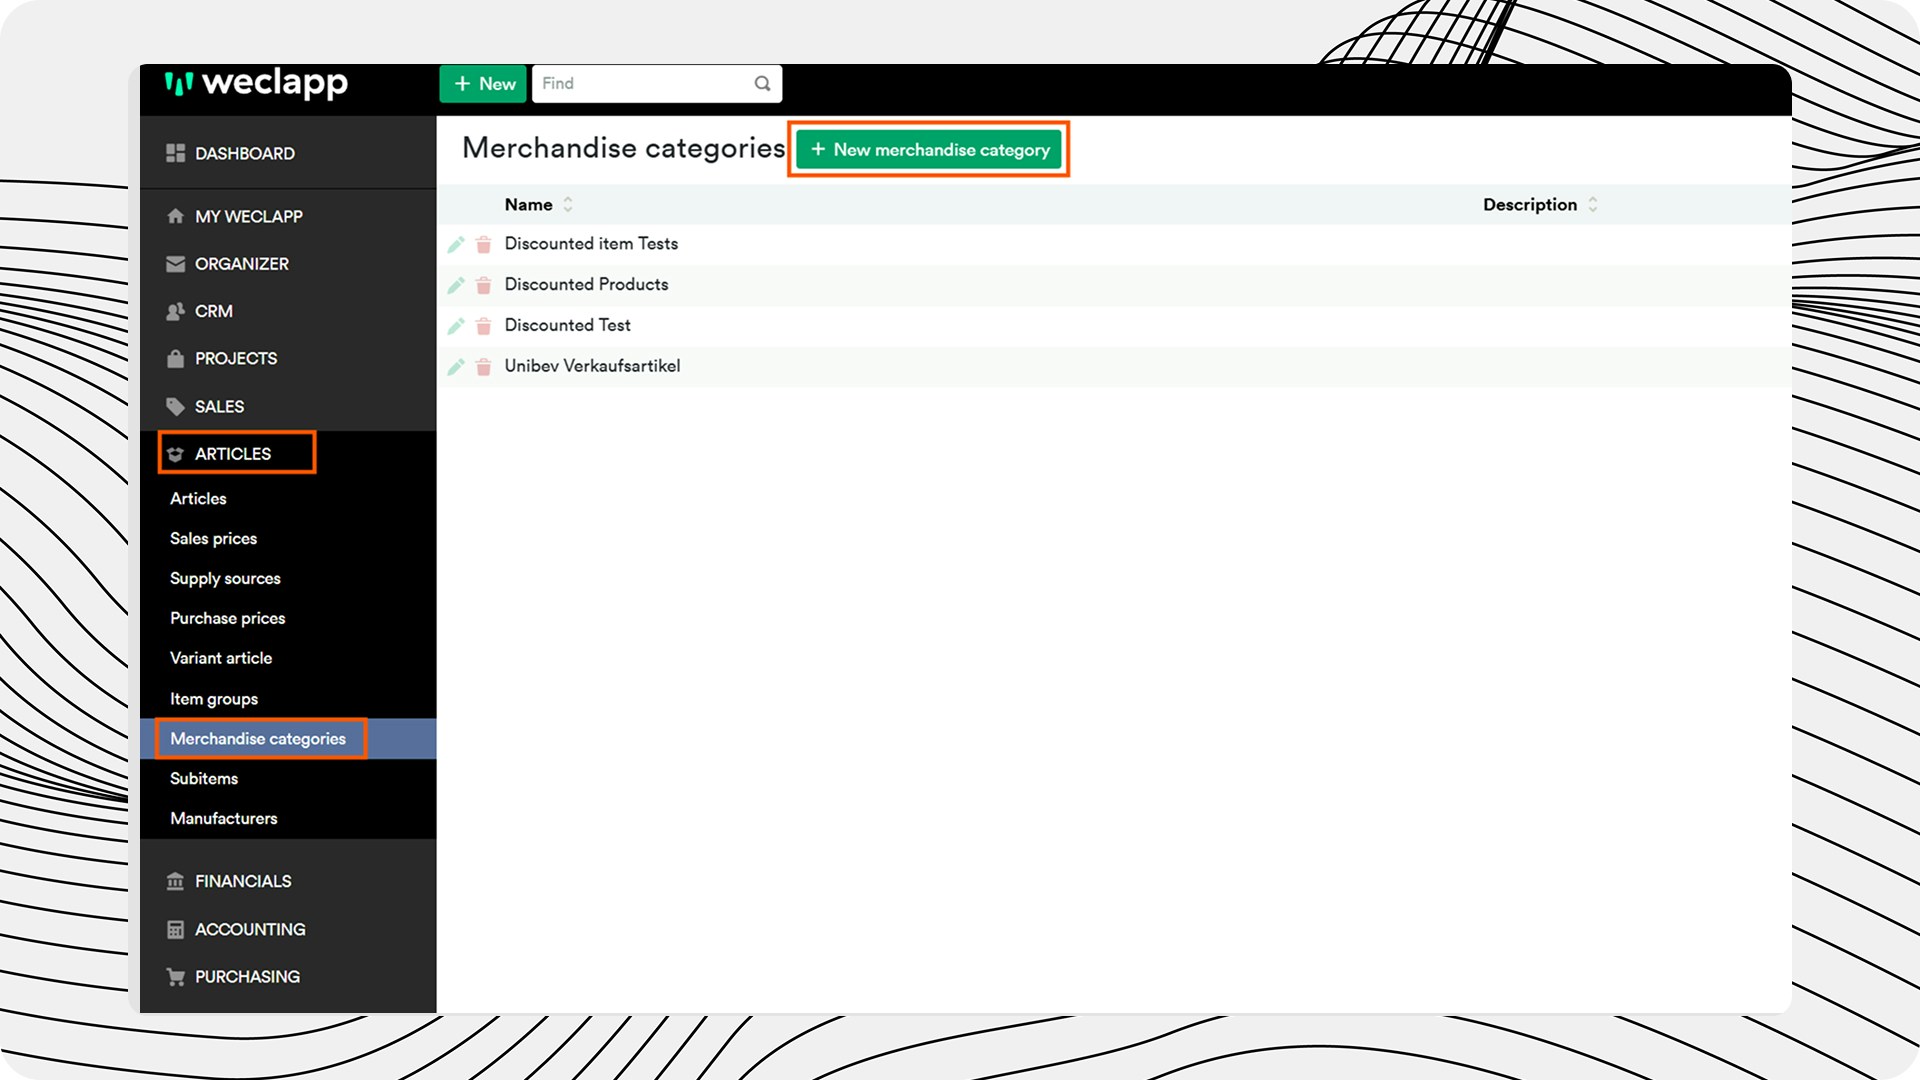
Navigate to "Merchandise categories" in the "Articles" menu and select an existing product group or create a "+ New merchandise category"
### Item Level Discounts
A distinction is made between generally applicable Item Level discounts and trading partner-specific scenarios (option 1 & option 2). You then link the product groups to relevant articles.
**Option 1: General Discount - Applied to all Trade Partners**
The following describes how to create discounts for material groups that apply to **all** business partners.
Navigate to "Merchandise categories" in the "Articles" menu and select an existing product group or create a "+ New merchandise category"
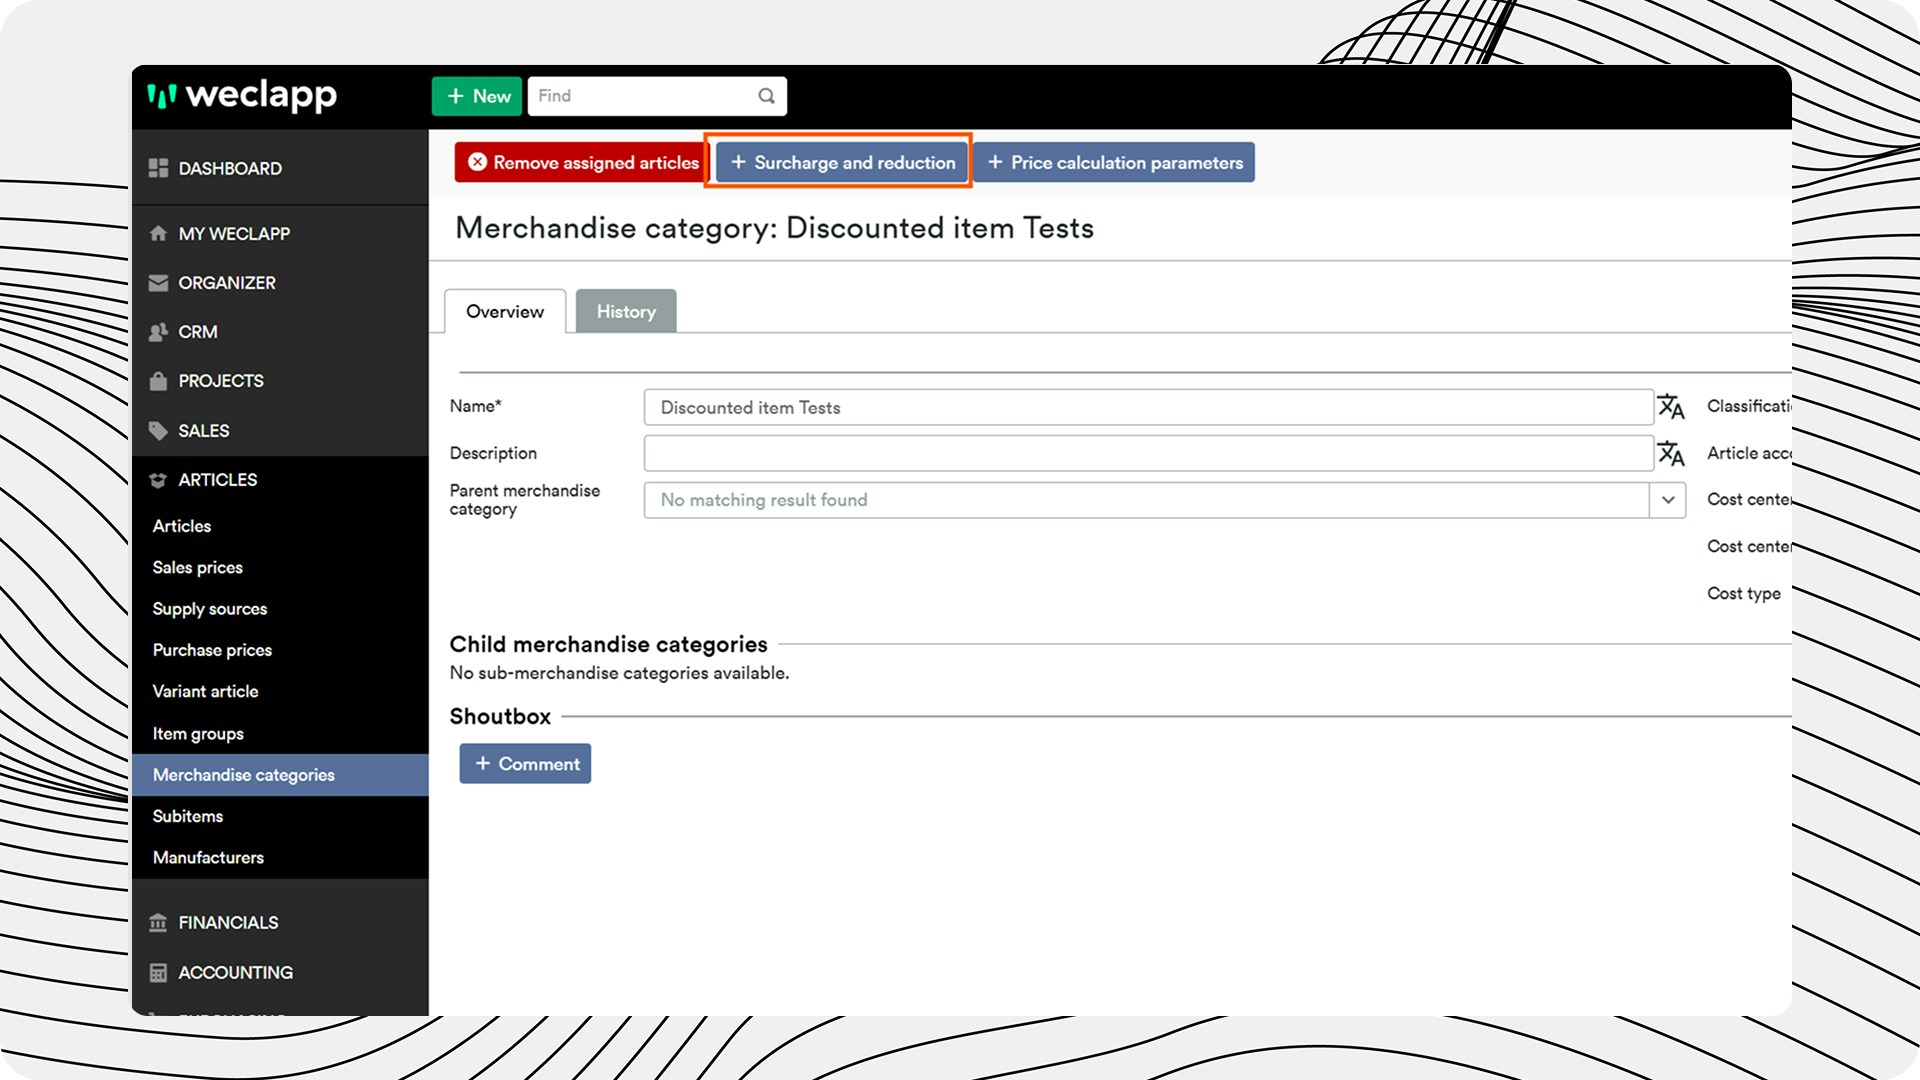
 Add the Item Level discount to the product group in the "Surcharge and reduction" tab by clicking on "+ Surcharge and reduction"
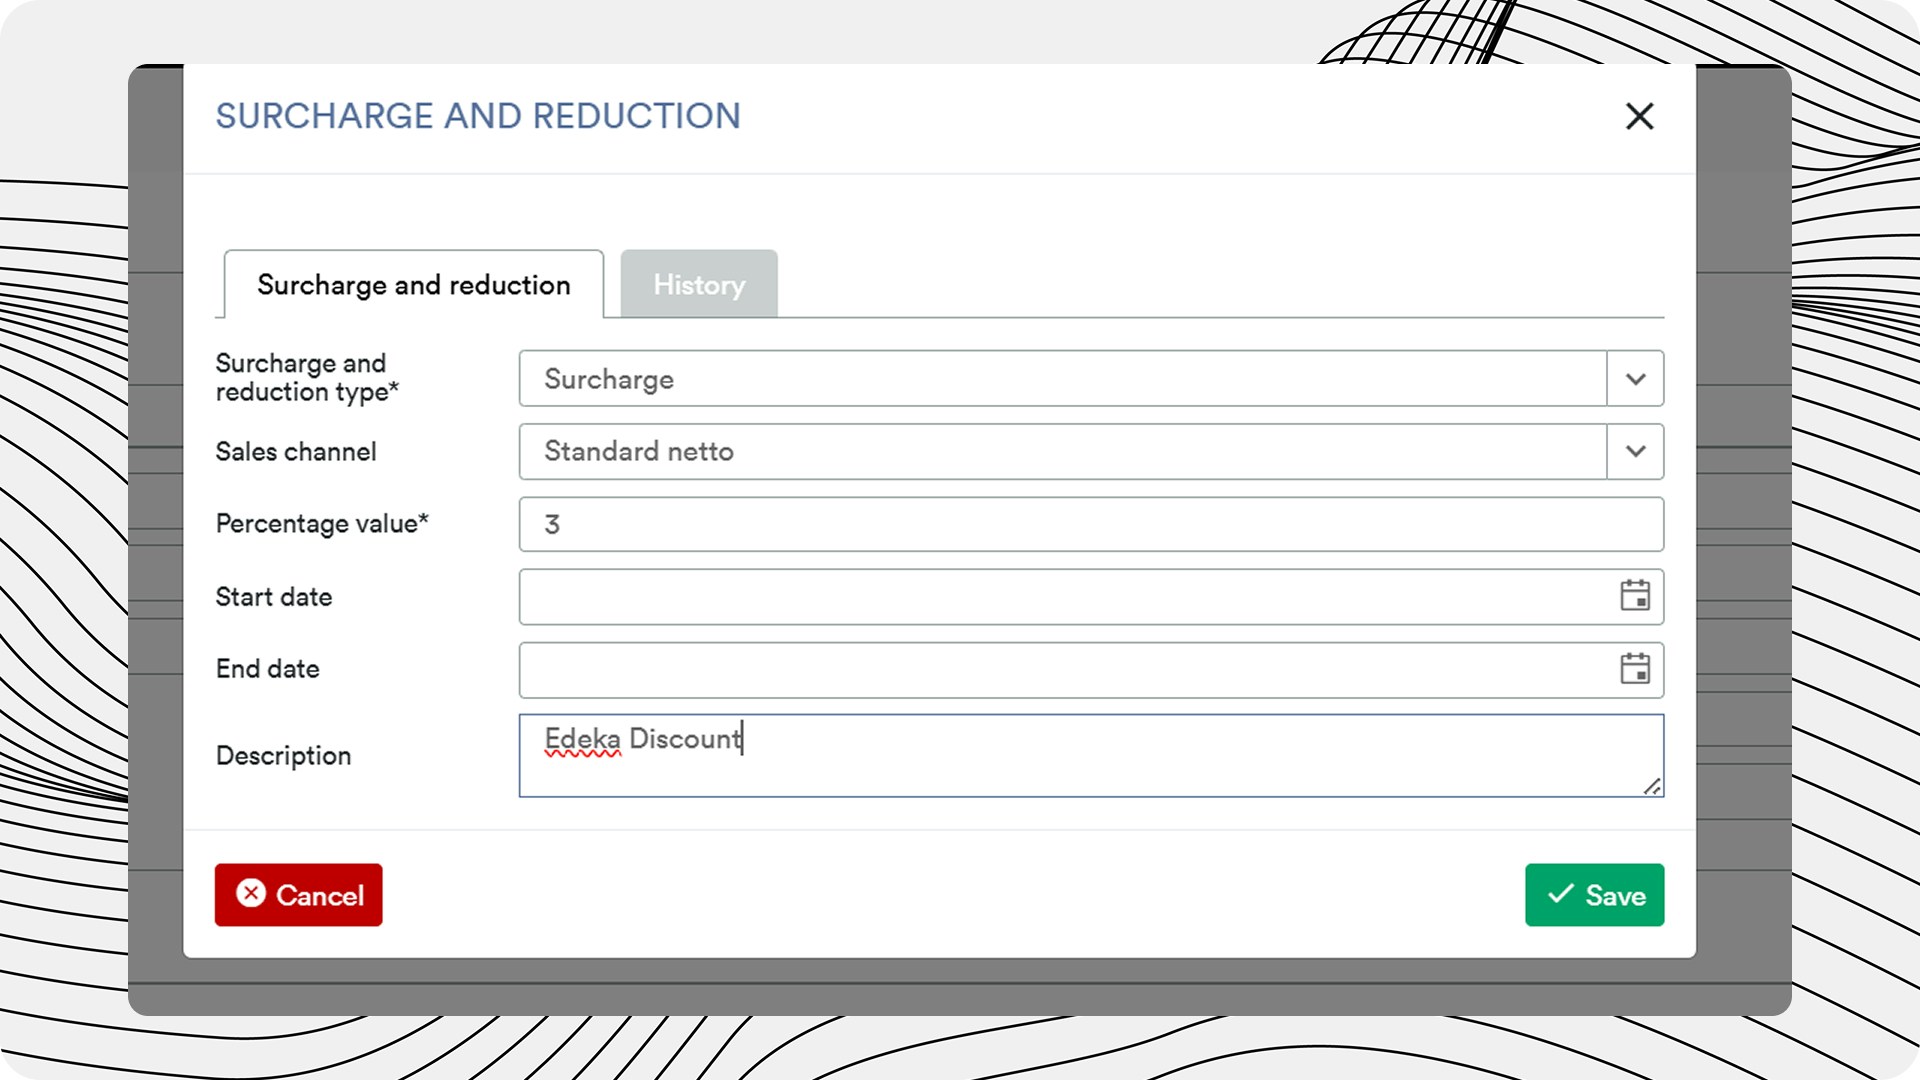
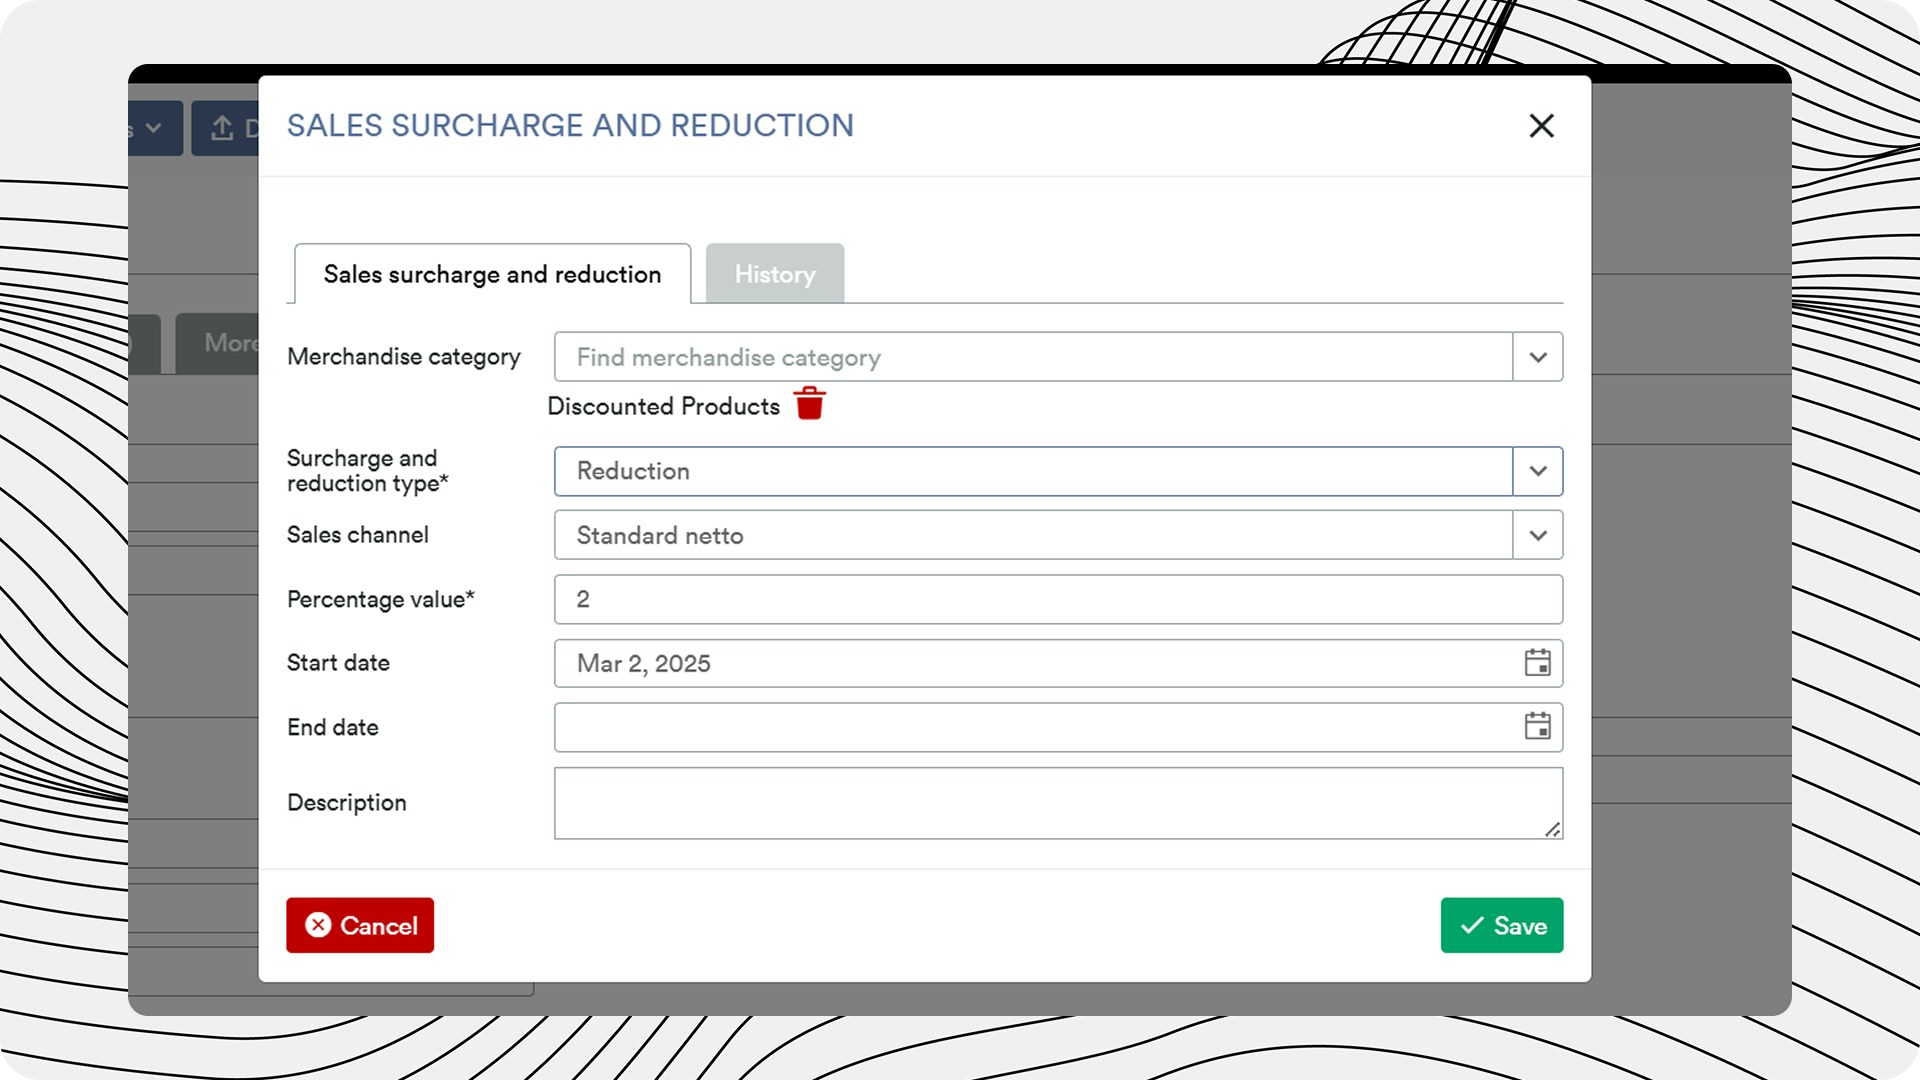
 In the window that opens, select the appropriate type (Surcharge / Reduction), Sales Channel, Percentage value and Start date. Then please save.
 **Option 2: Specific Discount - Applied to individual Trade Partner/s**
The following describes how to create the material group and corresponding discounts for **one or more** specific business partners.
Navigate to the customer for whom the discount should apply and open the tab "Sales surcharges and discounts". There you can either add new entries (via "+ Surcharge and discount sale") or edit existing entries
**Option 2: Specific Discount - Applied to individual Trade Partner/s**
The following describes how to create the material group and corresponding discounts for **one or more** specific business partners.
Navigate to the customer for whom the discount should apply and open the tab "Sales surcharges and discounts". There you can either add new entries (via "+ Surcharge and discount sale") or edit existing entries
 In the window that opens, select the product group you just created. And please select the distribution channel, discount percentage and start date, then please save.
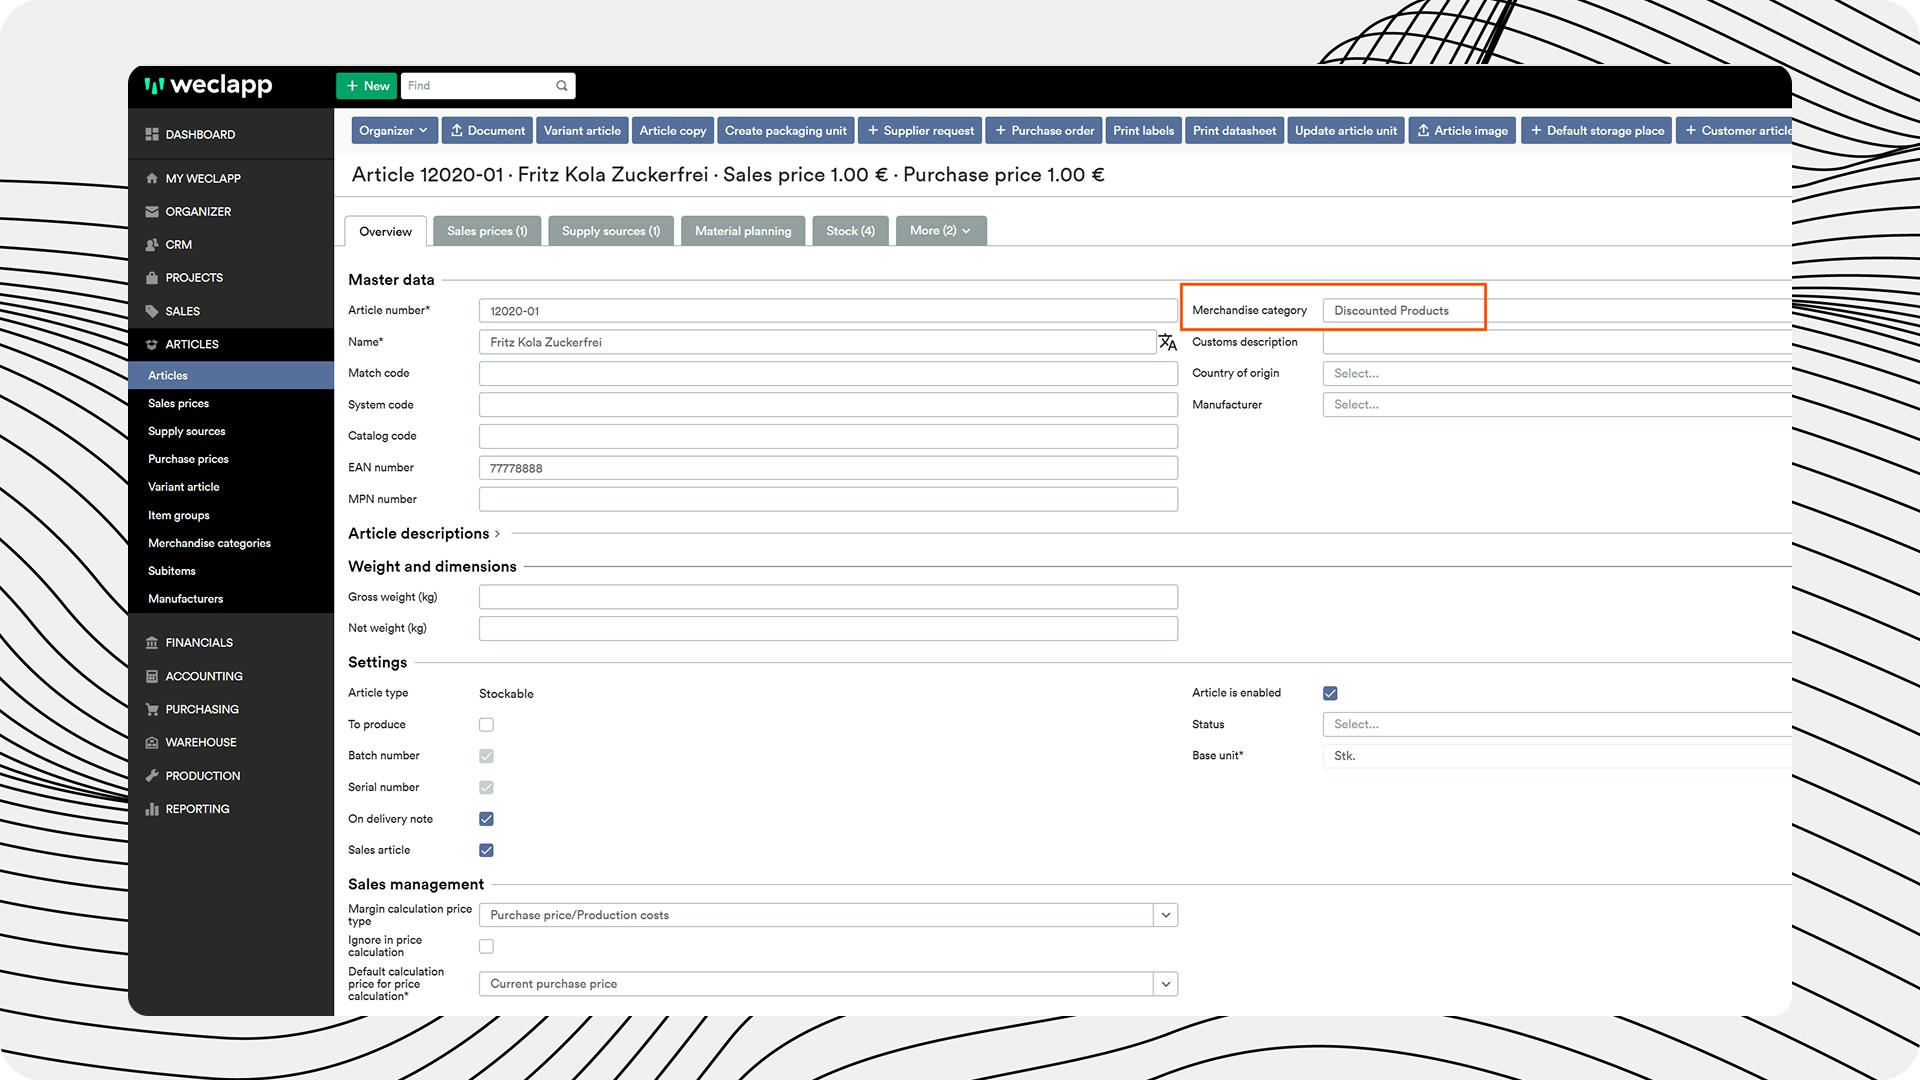
 **Link merchandise category to article**
Link the category to a relevant article. If you only want to configure parts of an item bill of materials (e.g. the individual item without a deposit in a bill of materials), it is important that the product group of this individual item is created and linked accordingly.
**Link merchandise category to article**
Link the category to a relevant article. If you only want to configure parts of an item bill of materials (e.g. the individual item without a deposit in a bill of materials), it is important that the product group of this individual item is created and linked accordingly.
 The article will be displayed in the corresponding product group.
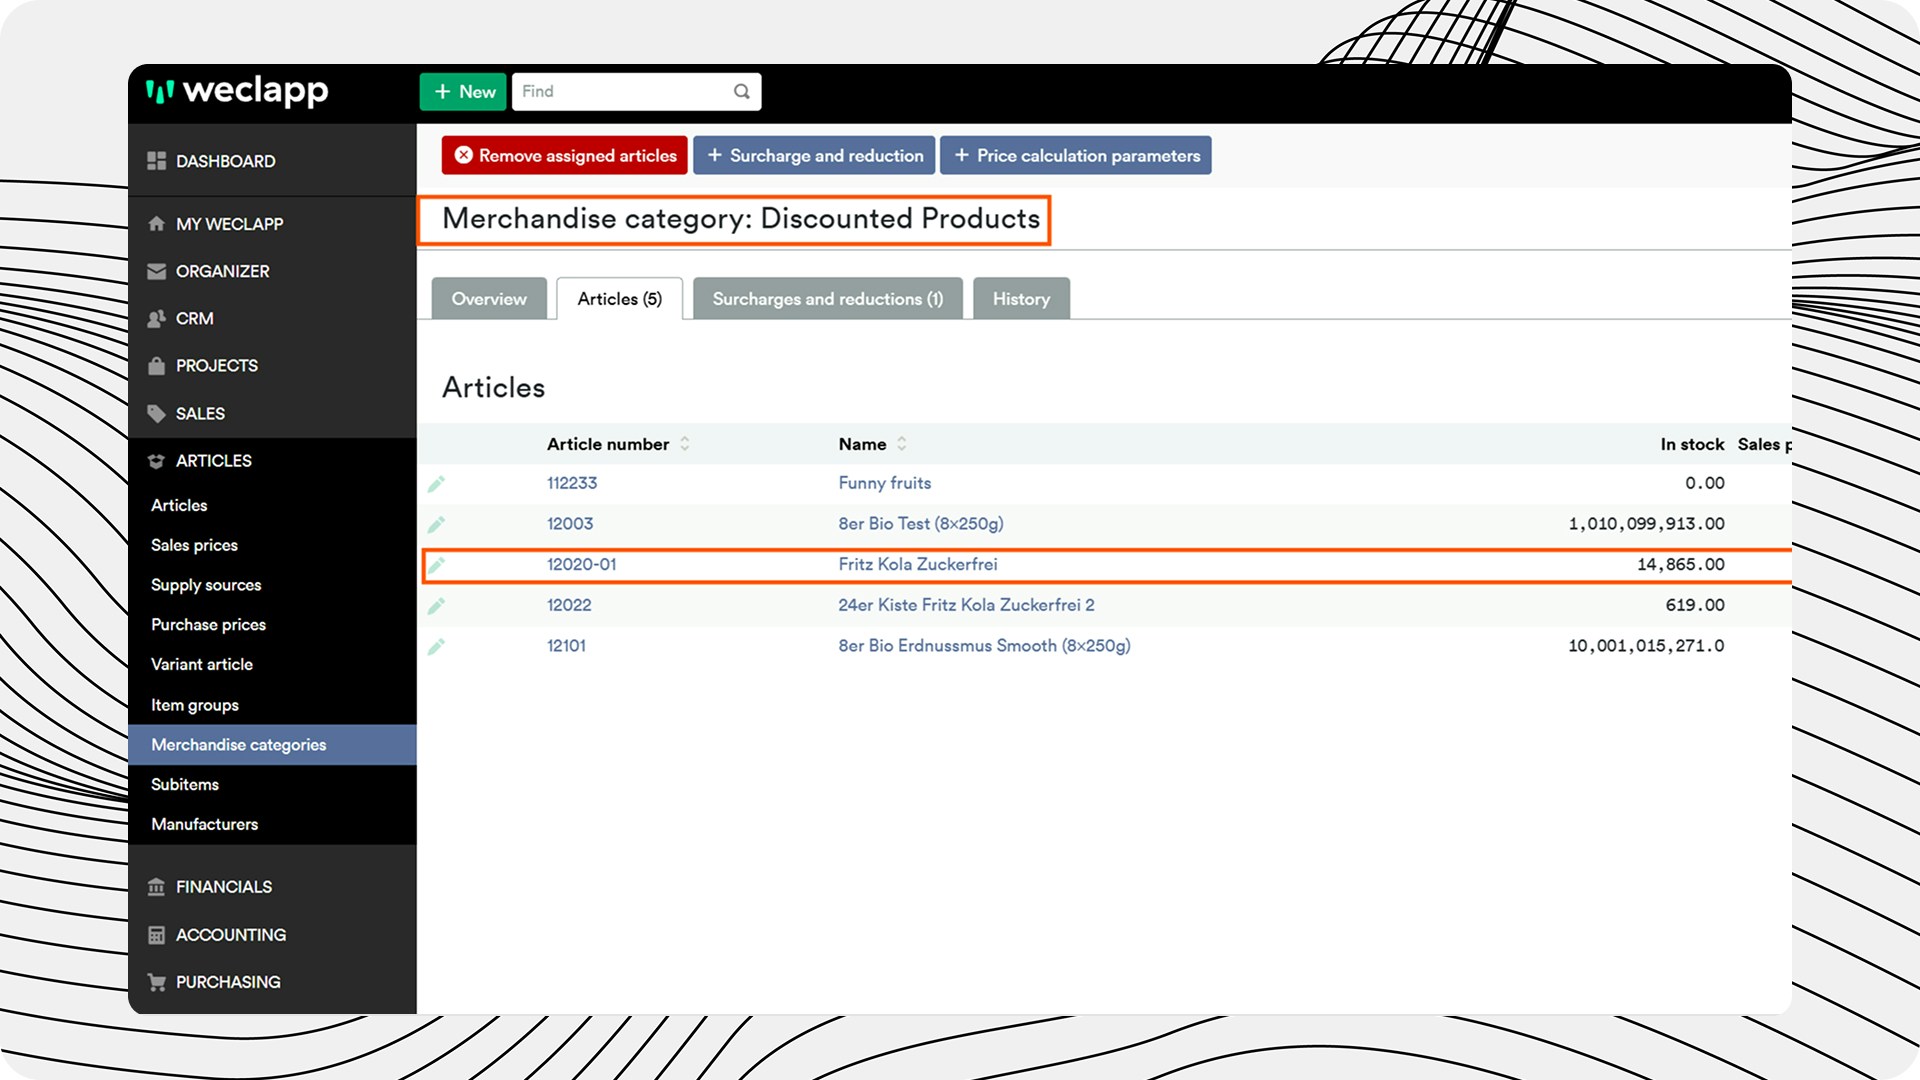 The stored discounts are taken into account for the configured customers.